热门标签
热门文章
- 1机器人xacro文件转换成urdf文件方法,并在rviz可视化_xacro转urdf
- 2kafka 2.11-2.4.1集群搭建(二)_kafka 2.4.1 与0.10.21
- 3程序员都逃不脱35岁失业的魔咒?_35岁程序员失业
- 4【kafka日常操作命令及分区分配】_kafka查看分区数量
- 5总结线性表的几种主要存储结构_线性表存储机构有哪些
- 6WebView通过网络请求加载html_qwebview必须要联网才能读取html文件吗
- 7Matlab:多目标优化测试集CEC2009(UF)_uf多目标测试函数
- 8树莓派系统安装、环境搭建、应用程序功能实现_树莓派安装系统
- 9文字从下往上滚动 各类插件及实现方法[vue]_文字从下往上无缝循环滚动的实现思路
- 10踩坑mybatis-plus,### Cause: com.mysql.jdbc.exceptions.jdbc4.MySQLSyntaxErrorException: Table ‘mybatis__caused by: com.mysql.jdbc.exceptions.jdbc4.mysqlsy
当前位置: article > 正文
pyqt 显示图片的若干方法
作者:笔触狂放9 | 2024-06-11 00:36:06
赞
踩
pyqt 显示图片
date: 2022-11-30 14:23
status: public
title: ‘pyqt 显示图片的若干方法’
单张图片
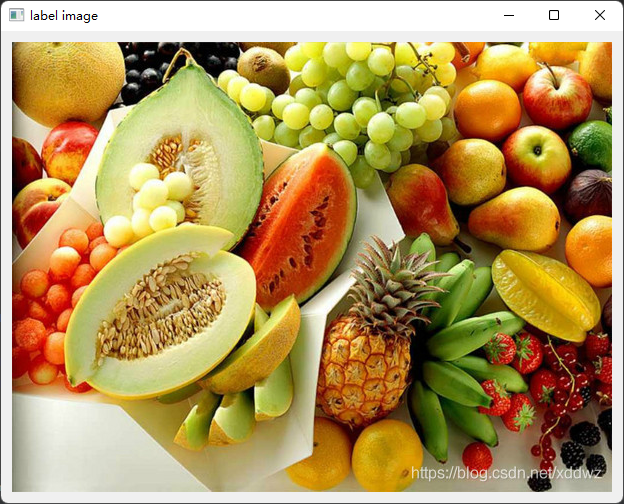
使用lable 显示图片
特点是最简单,但功能也最少。

#!/usr/bin/env python
# -*- coding: utf-8 -*-
import sys

from PyQt5.QtGui import QPixmap
from PyQt5.QtWidgets import QWidget, QApplication, QVBoxLayout, QLabel


class ImageLabel(QWidget):
    def __init__(self, parent=None):
        super().__init__(parent)
        self.resize(600, 400)
        self.setWindowTitle("label image")

        pix = QPixmap(r'C:\fruits.jpg')
        label = QLabel(self)
        label.setPixmap(pix)
        label.setScaledContents(True)  # 自适应QLabel大小

        layout = QVBoxLayout()
        layout.addWidget(label)
        self.setLayout(layout)


if __name__ == '__main__':
    app = QApplication(sys.argv)
    mainWidget = ImageLabel()
    mainWidget.show()
    sys.exit(app.exec_())
- 1
- 2
- 3
- 4
- 5
- 6
- 7
- 8
- 9
- 10
- 11
- 12
- 13
- 14
- 15
- 16
- 17
- 18
- 19
- 20
- 21
- 22
- 23
- 24
- 25
- 26
- 27
- 28
- 29
使用pyqtgraph 控件显示图片
来源 【PyQtGraph】显示图像
特点 可以对图片进行缩放操作,继承了pyqtgraph 的一些特点功能。

"""
安装依赖库:
1. Pillow
2. PySide2
3. PyQtGraph
from https://blog.csdn.net/zhy29563/article/details/119754910
"""

import sys

import numpy as np
import pyqtgraph as pg
from PIL import Image
from PyQt5.QtWidgets import QApplication, QVBoxLayout, QPushButton, QWidget, QFileDialog
from pyqtgraph import ImageView

# 设置 PyQtGraph 显示配置
########################################################################################################################
# 设置显示背景色为白色,默认为黑色
pg.setConfigOption('background', 'w')
# 设置显示前景色为黑色,默认为灰色
pg.setConfigOption('foreground', 'k')
# 设置图像显示以行为主,默认以列为主
pg.setConfigOption('imageAxisOrder', 'row-major')


class PyQtGraphicDemo(QWidget):
    def __init__(self, parent=None):
        super(PyQtGraphicDemo, self).__init__(parent)

        self.resize(600, 400)

        # 图像显示控件
        self.graphicsView = ImageView(self)
        # 隐藏直方图,菜单按钮,ROI
        self.graphicsView.ui.histogram.hide()
        self.graphicsView.ui.menuBtn.hide()
        self.graphicsView.ui.roiBtn.hide()

        image = Image.open(r'C:\fruits.jpg')
        if image is not None:
            # 如果之前未设置显示选项以行为主,这里需要对显示图像进行转置
            self.graphicsView.setImage(np.array(image))

        self.verticalLayout = QVBoxLayout(self)
        self.verticalLayout.addWidget(self.graphicsView)

        # 设置窗口布局
        self.setLayout(self.verticalLayout)


if __name__ == '__main__':
    app = QApplication(sys.argv)
    window = PyQtGraphicDemo()
    window.show()
    sys.exit(app.exec_())
- 1
- 2
- 3
- 4
- 5
- 6
- 7
- 8
- 9
- 10
- 11
- 12
- 13
- 14
- 15
- 16
- 17
- 18
- 19
- 20
- 21
- 22
- 23
- 24
- 25
- 26
- 27
- 28
- 29
- 30
- 31
- 32
- 33
- 34
- 35
- 36
- 37
- 38
- 39
- 40
- 41
- 42
- 43
- 44
- 45
- 46
- 47
- 48
- 49
- 50
- 51
- 52
- 53
- 54
- 55
- 56
多张图片
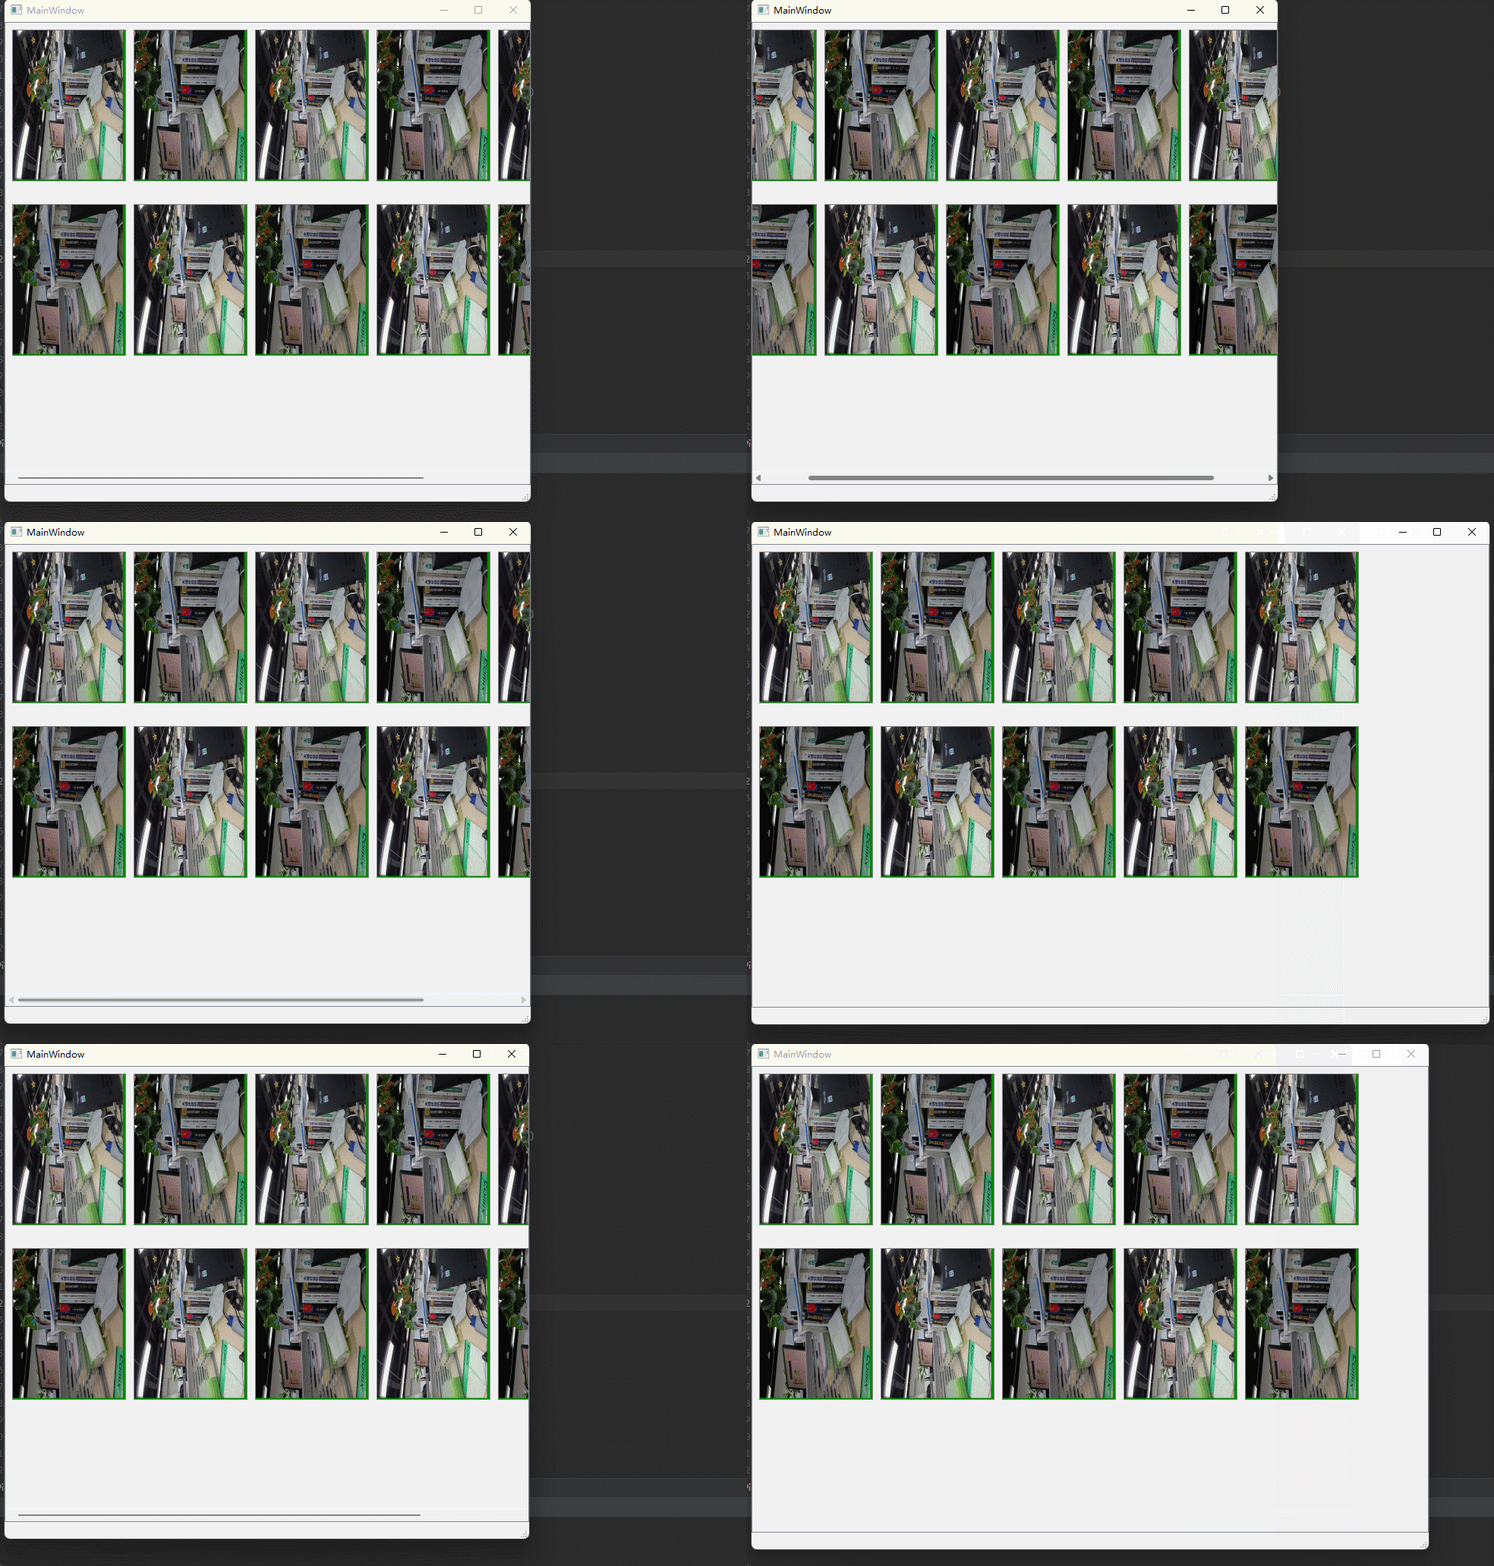
使用scrollArea 显示多张图片
来源:PyQt5-使用scrollArea实现图片查看器功能
特点是当窗口大小小于scrollArea 区域大小时有滑动条显示,可以拖动滑动条滑动界面。
但是这份代码有个缺点,就是当窗口大小大于scrollArea 区域大小时,你会发现scrollArea 以外的区域是空白的,也就是scrollArea 是固定大小的,区域外不会显示内容。注释掉 self.setFixedSize(850, 600) 可以测试看到。
这份代码的显示原理大致如下:创建一个scrollArea控件,对多张图像依次执行下面循环的操作:1. 创建一个label 显示image;2. label 添加到 一个QVBoxLayout 中,3. QVBoxLayout 作为一个临时的QWidget layout,4. 移动这个临时的 QWidget 到指定坐标。emmm 就不是很优雅。

# from https://blog.csdn.net/HG0724/article/details/116702824
import sys

from PyQt5.QtCore import *
from PyQt5.QtGui import *
from PyQt5.QtWidgets import *
from PyQt5.uic import loadUi


class Picture(QMainWindow):
    def __init__(self, parent=None, url=None):
        super().__init__(parent)
        self.url = url
        self.ui()

    def ui(self):
        loadUi('./show_pic.ui', self)

        # self.setFixedSize(850, 600)

        total = len(self.url)

        self.qw = QWidget()
        if total % 5 == 0:
            rows = int(total / 5)
        else:
            rows = int(total / 5) + 1
        self.qw.setMinimumSize(850, 230 * rows)
        for i in range(total):

            photo = QPixmap(self.url[i])
            # print('photo:',photo)
            # photo.loadFromData(req.content)
            width = photo.width()
            height = photo.height()
            print('width:', width, '      ', 'height:', height)

            if width == 0 or height == 0:
                continue
            tmp_image = photo.toImage()  # 将QPixmap对象转换为QImage对象
            size = QSize(width, height)
            # photo.convertFromImage(tmp_image.scaled(size, Qt.IgnoreAspectRatio))
            photo = photo.fromImage(tmp_image.scaled(size, Qt.IgnoreAspectRatio))

            # 为每个图片设置QLabel容器
            label = QLabel()
            label.setFixedSize(150, 200)
            label.setStyleSheet("border:1px solid gray")
            label.setPixmap(photo)
            label.setScaledContents(True)  # 图像自适应窗口大小

            vl = QVBoxLayout()
            vl.addWidget(label)

            tmp = QWidget(self.qw)
            tmp.setLayout(vl)
            tmp.move(160 * (i % 5), 230 * int(i / 5))

        self.scrollArea.setWidget(self.qw)  # 和ui文件中名字相同


if __name__ == '__main__':
    app = QApplication(sys.argv)
    # 这是我的文件夹中图片的路径

    import glob

    url = glob.glob(r"C:\waDump\*.jpg")
    pic = Picture(url=url)
    pic.show()
    sys.exit(app.exec_())
- 1
- 2
- 3
- 4
- 5
- 6
- 7
- 8
- 9
- 10
- 11
- 12
- 13
- 14
- 15
- 16
- 17
- 18
- 19
- 20
- 21
- 22
- 23
- 24
- 25
- 26
- 27
- 28
- 29
- 30
- 31
- 32
- 33
- 34
- 35
- 36
- 37
- 38
- 39
- 40
- 41
- 42
- 43
- 44
- 45
- 46
- 47
- 48
- 49
- 50
- 51
- 52
- 53
- 54
- 55
- 56
- 57
- 58
- 59
- 60
- 61
- 62
- 63
- 64
- 65
- 66
- 67
- 68
- 69
- 70
- 71
使用scrollArea + gridLayout 显示多张图片
可以缩放窗口,图像可以随着窗口变化,但只是图像间距拉伸,每行的图片数量没有变化

# -*- coding: utf-8 -*-
import glob
import time

from PyQt5 import QtWidgets
from PyQt5.QtCore import QSize, Qt
from PyQt5.QtGui import QPixmap
from PyQt5.QtWidgets import QApplication, QLabel, QGridLayout


class Picture(QtWidgets.QWidget):

    def __init__(self, parent=None):
        super(Picture, self).__init__(parent)
        print('Picture init')
        self.setWindowTitle('All Images')
        self.resize(800, 600)

        # ui components
        self.scrollArea = QtWidgets.QScrollArea()
        self.scrollArea.setWidgetResizable(True)
        self.scrollAreaWidgetContents = QtWidgets.QWidget()
        # self.scrollAreaWidgetContents.setObjectName("scrollAreaWidgetContents")
        self.scrollArea.setWidget(self.scrollAreaWidgetContents)
        self.gridLayout = QGridLayout(self.scrollAreaWidgetContents)
        self.v_layout = QtWidgets.QVBoxLayout(self)
        self.v_layout.addWidget(self.scrollArea)
        self.setLayout(self.v_layout)

        # vars
        self.max_columns = 5

    def load_images(self, paths):
        print('load images --start')
        total = len(paths)
        col = 0
        row = 0
        for i in range(total):
            self.max_columns = total if total < 5 else 5

            photo = QPixmap(paths[i])
            width = photo.width()
            height = photo.height()

            if width == 0 or height == 0:
                continue
            tmp_image = photo.toImage()  # 将QPixmap对象转换为QImage对象
            size = QSize(width, height)
            # photo.convertFromImage(tmp_image.scaled(size, Qt.IgnoreAspectRatio))
            photo = photo.fromImage(tmp_image.scaled(size, Qt.IgnoreAspectRatio))

            # 为每个图片设置QLabel容器
            label = QLabel()
            w = int(self.width() / self.max_columns * 0.8)
            h = int(w * photo.height() / photo.width())
            label.setFixedSize(w, h)
            label.setStyleSheet("border:1px solid gray")
            label.setPixmap(photo)
            label.setScaledContents(True)  # 图像自适应窗口大小

            self.gridLayout.addWidget(label, row, col)
            # 计算下一个label 位置
            if col < self.max_columns - 1:
                col = col + 1
            else:
                col = 0
                row += 1

        print('load images --end')


if __name__ == '__main__':
    start_time = time.time()
    print('main layout show')
    app = QApplication([])
    main_window = Picture()
    main_window.show()
    image_list = url = glob.glob(r"C:\waDump\*.jpg")
    # 加载图像显示
    main_window.load_images(image_list)
    print("耗时: {:.3f}秒".format(time.time() - start_time))
    app.exec_()
- 1
- 2
- 3
- 4
- 5
- 6
- 7
- 8
- 9
- 10
- 11
- 12
- 13
- 14
- 15
- 16
- 17
- 18
- 19
- 20
- 21
- 22
- 23
- 24
- 25
- 26
- 27
- 28
- 29
- 30
- 31
- 32
- 33
- 34
- 35
- 36
- 37
- 38
- 39
- 40
- 41
- 42
- 43
- 44
- 45
- 46
- 47
- 48
- 49
- 50
- 51
- 52
- 53
- 54
- 55
- 56
- 57
- 58
- 59
- 60
- 61
- 62
- 63
- 64
- 65
- 66
- 67
- 68
- 69
- 70
- 71
- 72
- 73
- 74
- 75
- 76
- 77
- 78
- 79
- 80
- 81
- 82
使用 QListWidget + 自定义的 QListWidgetItem 显示多张图片
可以缩放窗口,图像可以随着窗口重新排列,自定义的QListWidgetItem 可以灵活自定义显示样式。
代码参考这两个博客 PyQt使用笔记(六) 可多选, 有右键复制删除功能的ListWidget 2021.03.23 和 [pyqt] 使用自定义QListWidgetItem

# -*- coding: utf-8 -*-
import time

from PyQt5 import QtWidgets, QtCore, QtGui
from PyQt5.QtCore import QSize
from PyQt5.QtCore import Qt
from PyQt5.QtCore import pyqtSignal
from PyQt5.QtGui import QCursor
from PyQt5.QtGui import QPixmap
from PyQt5.QtWidgets import QApplication
from PyQt5.QtWidgets import QMenu, QAbstractItemView, QListWidgetItem, QListView
from PyQt5.QtWidgets import QWidget, QLabel, QVBoxLayout


class ImageListWidget(QtWidgets.QListWidget):
    signal = pyqtSignal(list)

    def __init__(self, *args, **kwargs):
        super().__init__(*args, **kwargs)
        self.image_cmp_widget = None
        self.single_image = None
        self.setWindowTitle('All Images')
        self.resize(1400, 700)
        self.setContextMenuPolicy(Qt.CustomContextMenu)
        # 创建QMenu信号事件
        self.customContextMenuRequested.connect(self.showMenu)
        self.contextMenu = QMenu(self)
        self.CMP = self.contextMenu.addAction('比较')
        # self.CP = self.contextMenu.addAction('复制')
        self.DL = self.contextMenu.addAction('删除')
        # self.CP.triggered.connect(self.copy)
        self.DL.triggered.connect(self.del_text)

        # 设置每个item size
        self.setGridSize(QtCore.QSize(220, 190))
        # 设置横向list
        self.setFlow(QListView.LeftToRight)
        # 设置换行
        self.setWrapping(True)
        # 窗口size 变化后重新计算列数
        self.setResizeMode(QtWidgets.QListView.Adjust)
        # 设置选择模式
        self.setSelectionMode(QAbstractItemView.ExtendedSelection)
        self.setIconSize(QSize(200, 150))

    # 显示右键菜单
    def showMenu(self, pos):
        # pos 鼠标位置
        # 菜单显示前,将它移动到鼠标点击的位置
        self.contextMenu.exec_(QCursor.pos())  # 在鼠标位置显示

    # 获取选择行的内容
    def selected_text(self):
        try:
            selected = self.selectedItems()
            texts = ''
            for item in selected:
                if texts:
                    texts = texts + '\n' + item.text()
                else:
                    texts = item.text()
        except BaseException as e:
            print(e)
            return
        print('selected_text texts', texts)
        return texts

    def copy(self):
        text = self.selected_text()
        if text:
            clipboard = QApplication.clipboard()
            clipboard.setText(text)

    def del_text(self):
        try:
            index = self.selectedIndexes()
            row = []

            for i in index:
                r = i.row()
                row.append(r)
            for i in sorted(row, reverse=True):
                self.takeItem(i)
        except BaseException as e:
            print(e)
            return
        self.signal.emit(row)

    def mouseDoubleClickEvent(self, e: QtGui.QMouseEvent) -> None:
        super().mouseDoubleClickEvent(e)
        print('double click')
        selected = self.selectedItems()
        img_path = ''
        for item in selected:
            img_path = item.image_path()
        if len(img_path) > 0:
            # 打开新窗口显示单张图片
            # self.single_image = SingleImageView(image=img_path, background=Qt.white)
            # self.single_image.show()
            pass
        pass

    def load_images(self, paths):
        for i in range(len(paths)):
            img_item = ImageQListWidgetItem("dump image ***", paths[i])
            self.addItem(img_item)
            self.setItemWidget(img_item, img_item.widget)

            # 刷新界面
            QApplication.processEvents()


# 自定义的item 继承自QListWidgetItem
class ImageQListWidgetItem(QListWidgetItem):
    def __init__(self, name, img_path):
        super().__init__()

        self.img_path = img_path
        # 自定义item中的widget 用来显示自定义的内容
        self.widget = QWidget()
        # 用来显示name
        self.nameLabel = QLabel()
        self.nameLabel.setText(name)
        # 用来显示avator(图像)
        self.avatorLabel = QLabel()
        # 设置图像源 和 图像大小
        img_obg = QPixmap(img_path)
        width = img_obg.width()
        height = img_obg.height()
        scale_size = QSize(200, 150)
        if width < height:
            scale_size = QSize(150, 200)
        self.avatorLabel.setPixmap(QPixmap(img_path).scaled(scale_size))
        # 图像自适应窗口大小
        self.avatorLabel.setScaledContents(True)
        # 设置布局用来对nameLabel和avatorLabel进行布局
        self.hbox = QVBoxLayout()
        self.hbox.addWidget(self.avatorLabel)
        self.hbox.addWidget(self.nameLabel)
        self.hbox.addStretch(1)
        # 设置widget的布局
        self.widget.setLayout(self.hbox)
        # 设置自定义的QListWidgetItem的sizeHint,不然无法显示
        self.setSizeHint(self.widget.sizeHint())

    def image_path(self):
        return self.img_path


if __name__ == '__main__':
    print('main layout show')
    now = time.time()
    app = QApplication([])
    main_window = ImageListWidget()
    main_window.show()

    image_list = ['icon.jpg', 'icon.jpg', 'icon.jpg']
    # 数据扩充
    image_list = image_list + image_list + image_list + image_list
    main_window.load_images(image_list)

    # 绑定点击槽函数 点击显示对应item中的name
    main_window.itemClicked.connect(lambda item: print('clicked item label:', item.nameLabel.text()))
    print("ImageListWidget 耗时: {:.2f}秒".format(time.time() - now))

    app.exec_()
- 1
- 2
- 3
- 4
- 5
- 6
- 7
- 8
- 9
- 10
- 11
- 12
- 13
- 14
- 15
- 16
- 17
- 18
- 19
- 20
- 21
- 22
- 23
- 24
- 25
- 26
- 27
- 28
- 29
- 30
- 31
- 32
- 33
- 34
- 35
- 36
- 37
- 38
- 39
- 40
- 41
- 42
- 43
- 44
- 45
- 46
- 47
- 48
- 49
- 50
- 51
- 52
- 53
- 54
- 55
- 56
- 57
- 58
- 59
- 60
- 61
- 62
- 63
- 64
- 65
- 66
- 67
- 68
- 69
- 70
- 71
- 72
- 73
- 74
- 75
- 76
- 77
- 78
- 79
- 80
- 81
- 82
- 83
- 84
- 85
- 86
- 87
- 88
- 89
- 90
- 91
- 92
- 93
- 94
- 95
- 96
- 97
- 98
- 99
- 100
- 101
- 102
- 103
- 104
- 105
- 106
- 107
- 108
- 109
- 110
- 111
- 112
- 113
- 114
- 115
- 116
- 117
- 118
- 119
- 120
- 121
- 122
- 123
- 124
- 125
- 126
- 127
- 128
- 129
- 130
- 131
- 132
- 133
- 134
- 135
- 136
- 137
- 138
- 139
- 140
- 141
- 142
- 143
- 144
- 145
- 146
- 147
- 148
- 149
- 150
- 151
- 152
- 153
- 154
- 155
- 156
- 157
- 158
- 159
- 160
- 161
- 162
- 163
- 164
- 165
- 166
声明:本文内容由网友自发贡献,不代表【wpsshop博客】立场,版权归原作者所有,本站不承担相应法律责任。如您发现有侵权的内容,请联系我们。转载请注明出处:https://www.wpsshop.cn/w/笔触狂放9/article/detail/700986
推荐阅读
相关标签


