
热门标签
热门文章
- 1一文搞懂卡片、堆叠式所有轮播图原理-JavaScript实现轮播图_卡片式轮播图
- 2Anchor-free目标检测论文汇总
- 3微信小程序长按和点击同时存在时,2个都会触发的问题_touchstart和tap同时触发
- 4图解目标检测 之 Fast-RCNN 算法 原理 详解_fastcnn原理
- 5时间序列模型_时间序列模型有哪几种
- 6Unity5.x ScriptableObject数据存储结合AssetBundle打包实现数据资源热更新_unity scriptableobject需要打包吗
- 7阿尔法编程python答案第四章_智慧职教Python编程基础答案第四章单元测试答案
- 8OpenGL使用及面试题汇总_opengl面试题
- 9Pycharm中无解释器interpreter的解决方法_pycharm project interpreter没有
- 10用nodejs构建MongoDB数据库,实现用户管理系统 | 小项目_nestjs mongodb 做管理系统
当前位置: article > 正文
Android集成Unity_unity for android
作者:我家小花儿 | 2024-02-20 06:41:35
赞
踩
unity for android
前期准备材料
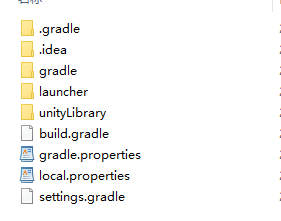
1、已经导出成功的unity项目,导出的unity项目内部结构见下图
2、新建一个或者使用已有项目
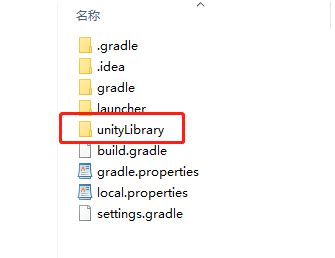
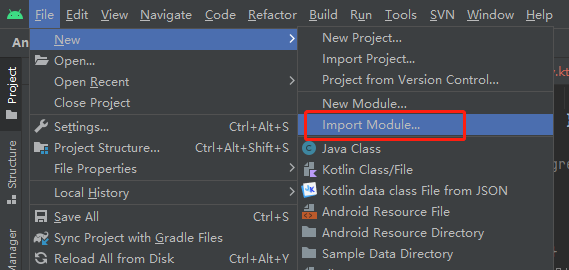
1、第一步,导入unity
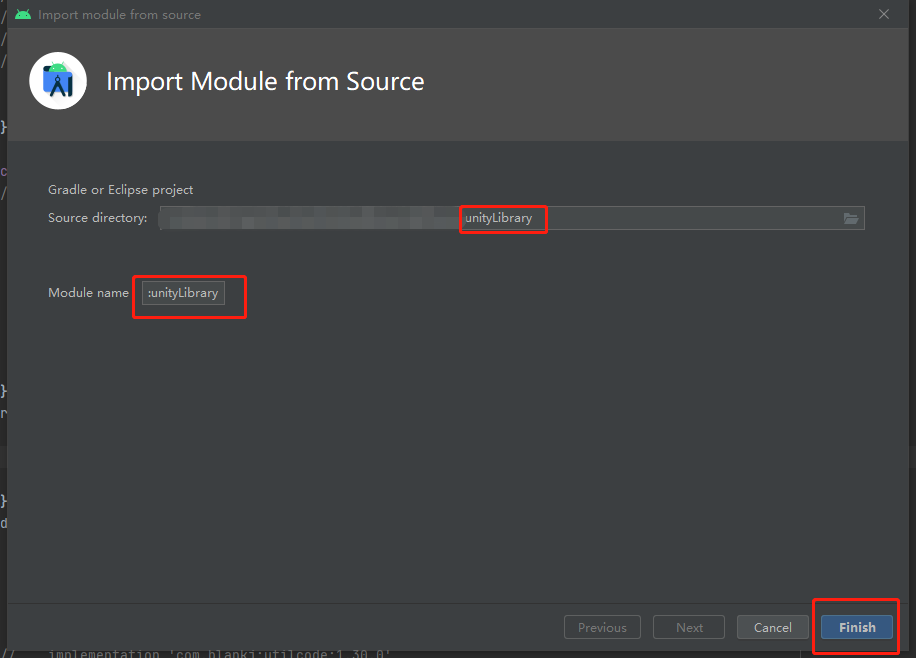
打开安卓项目,导入unity的module,找到unity项目中的unityLibrary,选中此module,点击finish后稍等片刻。
2、解决导入module过程中出现的问题
a、在项目的gradle.properties中添加如下代码
unityStreamingAssets=.unity3d, google-services-desktop.json, google-services.json, GoogleService-Info.plist
- 1
- 2
b、在主module中的build.gradle中添加如下代码
configurations.all {
//    重点大问题:一次性解决support库版本不一致,直接改了所有的依赖项目
    resolutionStrategy.eachDependency { DependencyResolveDetails details ->
        def requested = details.requested
        if (requested.group == 'com.android.support') {
            if (!requested.name.startsWith("multidex")) {
                details.useVersion '28.0.0'
            }
        }
    }
}
- 1
- 2
- 3
- 4
- 5
- 6
- 7
- 8
- 9
- 10
- 11
- 12
- 13
3、将unity项目中的unityLibrary中新建一个MyUnityPlayer类,继承UnityPlayer类,然后将UN体验项目rebuild,生成的aar文件,复制到安卓项目主module的libs中,并在build.gradle中引用。
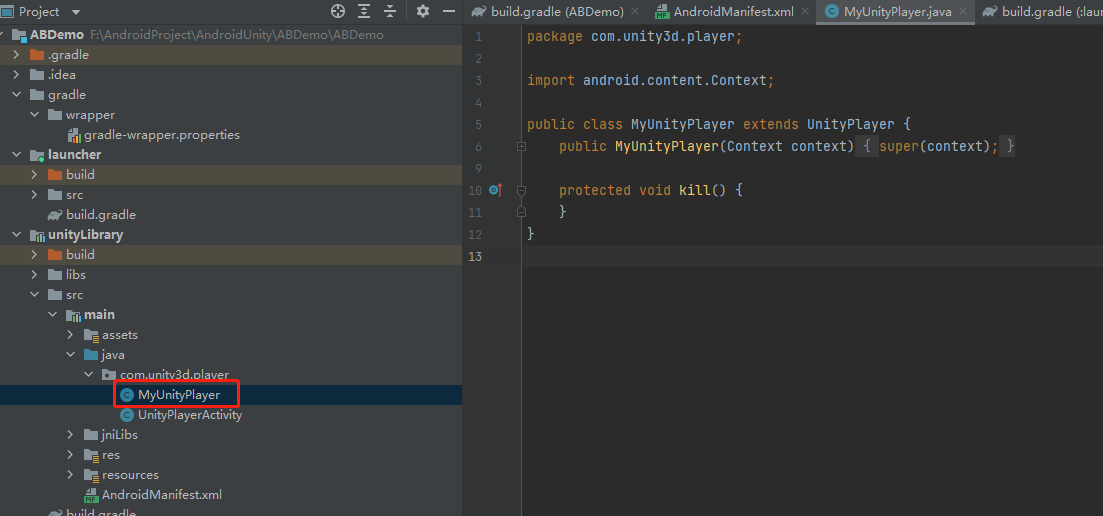
public class MyUnityPlayer extends UnityPlayer {
    public MyUnityPlayer(Context context) {
        super(context);
    }

    protected void kill() {
    }
}
- 1
- 2
- 3
- 4
- 5
- 6
- 7
- 8
- 9
- 10
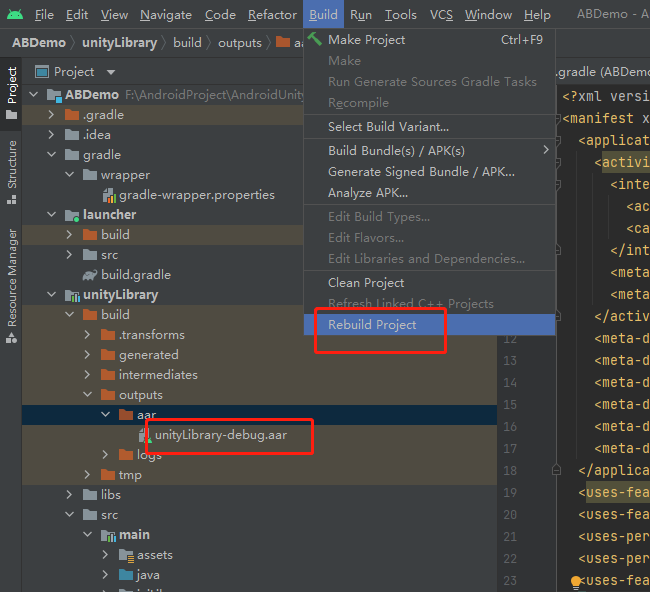
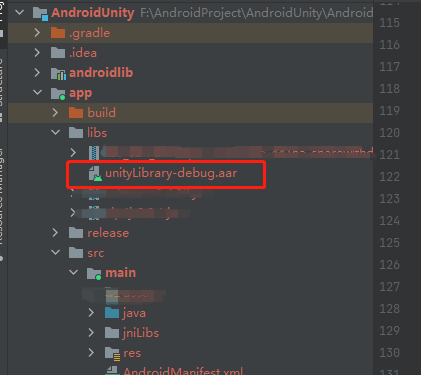
在build.gradle中引用aar:
implementation(name: 'unityLibrary-debug', ext: 'aar')
- 1
- 2
4、将unityLibrary中jniLibs中的so文件复制到安卓项目的主module中。
如下是unityLibrary中so文件的位置:
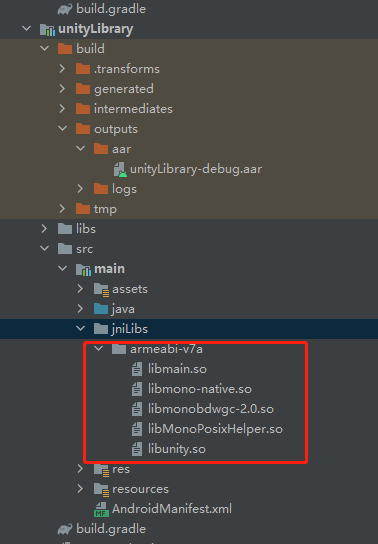
如下是主module中位置,如果没有jniLibs文件夹新建即可。

5、在主module中新建页面,并运行程序,成功展示unity效果,然后写上跳转到此页面代码,运行即可看到unity效果。
a、在主module中新建UnityActivity,布局文件中只有一个LinearLayout即可:
<?xml version="1.0" encoding="utf-8"?>
<LinearLayout
    xmlns:android="http://schemas.android.com/apk/res/android"
    xmlns:app="http://schemas.android.com/apk/res-auto"
    xmlns:tools="http://schemas.android.com/tools"
    android:layout_width="match_parent"
    android:layout_height="match_parent"
    tools:context=".unity.SecondActivity">

    <LinearLayout
        android:id="@+id/unityLayout"
        android:layout_width="match_parent"
        android:layout_height="match_parent"
        android:layout_marginTop="8dp"
        android:layout_weight="10"
        android:orientation="horizontal"
        app:layout_constraintTop_toTopOf="parent"
        tools:layout_editor_absoluteX="104dp">

    </LinearLayout>

</LinearLayout>

- 1
- 2
- 3
- 4
- 5
- 6
- 7
- 8
- 9
- 10
- 11
- 12
- 13
- 14
- 15
- 16
- 17
- 18
- 19
- 20
- 21
- 22
- 23
b、UnityActivity中初始化LinearLayout和MyUnityPlayer,并重写unityplayer生命周期方法
    private LinearLayout unityLayout;
    private MyUnityPlayer mUnityPlayer;

//  在onCreate中初始化
        unityLayout = findViewById(R.id.unityLayout);
        getWindow().setFormat(PixelFormat.RGBX_8888); // <--- This makes xperia play happy
        // 创建Unity视图
        mUnityPlayer = new MyUnityPlayer(this);
        // 添加Unity视图
        unityLayout.addView(mUnityPlayer.getView());
        mUnityPlayer.requestFocus();


//  以下是生命周期方法---必须要写,否则黑屏

    @Override protected void onNewIntent(Intent intent) {

// To support deep linking, we need to make sure that the client can get access to

// the last sent intent. The clients access this through a JNI api that allows them

// to get the intent set on launch. To update that after launch we have to manually

// replace the intent with the one caught here.

        super.onNewIntent(intent);
        setIntent(intent);

    }

// Quit Unity

    @Override protected void onDestroy ()

    {

        mUnityPlayer.quit();

        super.onDestroy();

    }

// Pause Unity

    @Override protected void onPause()

    {

        super.onPause();

        mUnityPlayer.pause();

    }

// Resume Unity

    @Override protected void onResume()

    {

        super.onResume();

        mUnityPlayer.resume();

    }

// Low Memory Unity

    @Override public void onLowMemory()

    {

        super.onLowMemory();

        mUnityPlayer.lowMemory();

    }

// Trim Memory Unity

    @Override public void onTrimMemory(int level)

    {

        super.onTrimMemory(level);

        if (level == TRIM_MEMORY_RUNNING_CRITICAL)

        {

            mUnityPlayer.lowMemory();

        }

    }

// This ensures the layout will be correct.

    @Override public void onConfigurationChanged(Configuration newConfig)

    {

        super.onConfigurationChanged(newConfig);

        mUnityPlayer.configurationChanged(newConfig);

    }

// Notify Unity of the focus change.

    @Override public void onWindowFocusChanged(boolean hasFocus)

    {

        super.onWindowFocusChanged(hasFocus);

        mUnityPlayer.windowFocusChanged(hasFocus);

    }

// For some reason the multiple keyevent type is not supported by the ndk.

// Force event injection by overriding dispatchKeyEvent().

    @Override public boolean dispatchKeyEvent(KeyEvent event)

    {

        if (event.getAction() == KeyEvent.ACTION_MULTIPLE)

            return mUnityPlayer.injectEvent(event);

        return super.dispatchKeyEvent(event);

    }

// Pass any events not handled by (unfocused) views straight to UnityPlayer

    @Override public boolean onKeyUp(int keyCode, KeyEvent event) { return mUnityPlayer.injectEvent(event); }

    @Override public boolean onKeyDown(int keyCode, KeyEvent event) { return mUnityPlayer.injectEvent(event); }

    @Override public boolean onTouchEvent(MotionEvent event) { return mUnityPlayer.injectEvent(event); }

    /*API12*/ public boolean onGenericMotionEvent(MotionEvent event) { return mUnityPlayer.injectEvent(event); }
- 1
- 2
- 3
- 4
- 5
- 6
- 7
- 8
- 9
- 10
- 11
- 12
- 13
- 14
- 15
- 16
- 17
- 18
- 19
- 20
- 21
- 22
- 23
- 24
- 25
- 26
- 27
- 28
- 29
- 30
- 31
- 32
- 33
- 34
- 35
- 36
- 37
- 38
- 39
- 40
- 41
- 42
- 43
- 44
- 45
- 46
- 47
- 48
- 49
- 50
- 51
- 52
- 53
- 54
- 55
- 56
- 57
- 58
- 59
- 60
- 61
- 62
- 63
- 64
- 65
- 66
- 67
- 68
- 69
- 70
- 71
- 72
- 73
- 74
- 75
- 76
- 77
- 78
- 79
- 80
- 81
- 82
- 83
- 84
- 85
- 86
- 87
- 88
- 89
- 90
- 91
- 92
- 93
- 94
- 95
- 96
- 97
- 98
- 99
- 100
- 101
- 102
- 103
- 104
- 105
- 106
- 107
- 108
- 109
- 110
- 111
- 112
- 113
- 114
- 115
- 116
- 117
- 118
- 119
- 120
- 121
- 122
- 123
- 124
- 125
- 126
- 127
- 128
- 129
- 130
- 131
- 132
- 133
- 134
- 135
- 136
- 137
- 138
- 139
- 140
- 141
- 142
- 143
- 144
- 145
- 146
- 147
- 148
最后
如果想要成为架构师或想突破20~30K薪资范畴,那就不要局限在编码,业务,要会选型、扩展,提升编程思维。此外,良好的职业规划也很重要,学习的习惯很重要,但是最重要的还是要能持之以恒,任何不能坚持落实的计划都是空谈。
如果你没有方向,这里给大家分享一套由阿里高级架构师编写的《Android八大模块进阶笔记》,帮大家将杂乱、零散、碎片化的知识进行体系化的整理,让大家系统而高效地掌握Android开发的各个知识点。

相对于我们平时看的碎片化内容,这份笔记的知识点更系统化,更容易理解和记忆,是严格按照知识体系编排的。
全套视频资料:
一、面试合集
二、源码解析合集
三、开源框架合集
欢迎大家一键三连支持,若需要文中资料,直接扫描文末CSDN官方认证微信卡片免费领取↓↓↓

声明:本文内容由网友自发贡献,不代表【wpsshop博客】立场,版权归原作者所有,本站不承担相应法律责任。如您发现有侵权的内容,请联系我们。转载请注明出处:https://www.wpsshop.cn/w/我家小花儿/article/detail/118929
推荐阅读
相关标签

