- 1Linux和Windows系统使用脚本操作jar包_windows jar包启动脚本详解
- 2GPT模型微调教程:打造您专属的ChatGPT模型_code gpt 微调
- 3我的python中matplotlib和seaborn使用记录_matplotlib与seaborn的适配版本
- 4汇编语言(第四版) 实验一 查看CPU和内存,用机器指令和汇编指令编程_汇编语言查看运行结果
- 5T-primes (规律 思维 筛素数)
- 6使用 minScreenWidth 调整 sap.m.Table 某一列动态显示与否的例子_sap.m.table 自适应
- 7springboot/ssm学生请假管理系统 高校请假审批管理系统Java系统
- 8【yolov8目标检测】使用yolov8训练自己的数据集
- 9angular调试_使用Angular Augury调试代码
- 10库函数查询工具与程序员问答社区分享_查看c语言库函数的软件有哪些
Three 之 three.js (webgl)基础 3D 辅助对象 Helper 开发的工具简单介绍_three.js camerahelper
赞
踩
Three 之 three.js (webgl)基础 3D 辅助对象 Helper 开发的工具简单介绍
目录
Three 之 three.js (webgl)基础 3D 辅助对象 Helper 开发的工具简单介绍
6、DirectionalLightHelper 平行光的辅助对象
9、HemisphereLightHelper 半球形光源网格辅助对象
11、PointLightHelper 点光源菱形网格辅助对象
13、RectAreaLightHelper 矩形光辅助对象
15、VertexNormalsHelper 顶点的法线辅助对象
16、VertexTangentsHelper 顶点切向量辅助对象
一、简单介绍
Three js 开发的一些知识整理,方便后期遇到类似的问题,能够及时查阅使用。
本节介绍, three.js (webgl)为了辅助开发,常常会用到一些辅助对象了帮助开发的工具,如果有不足之处,欢迎指出,或者你有更好的方法,欢迎留言。
二、辅助对象 Helper
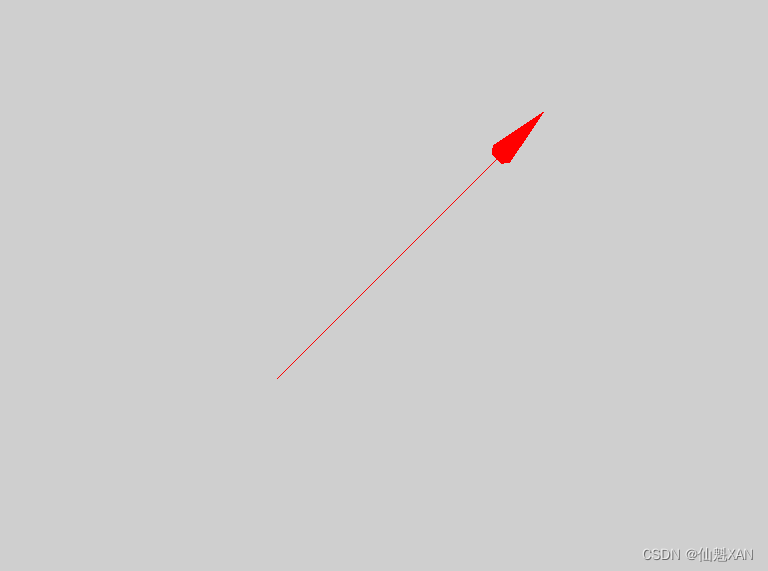
1、ArrowHelper 箭头辅助对象
用于模拟方向的3维箭头对象。
- const dir = new THREE.Vector3( 1, 2, 0 );
-
- //normalize the direction vector (convert to vector of length 1)
- dir.normalize();
-
- const origin = new THREE.Vector3( 0, 0, 0 );
- const length = 1;
- const hex = 0xffff00;
-
- const arrowHelper = new THREE.ArrowHelper( dir, origin, length, hex );
- scene.add( arrowHelper );
1)构造函数
ArrowHelper(dir : Vector3, origin : Vector3, length : Number, hex : Number, headLength : Number, headWidth : Number )
dir -- 基于箭头原点的方向. 必须为单位向量.
origin -- 箭头的原点.
length -- 箭头的长度. 默认为 1.
hex -- 定义的16进制颜色值. 默认为 0xffff00.
headLength -- 箭头头部(锥体)的长度. 默认为箭头长度的0.2倍(0.2 * length).
headWidth -- The width of the head of the arrow. Default is 0.2 * headLength.
2)属性
请到基类 Object3D 页面查看公共属性.
.line : Line
包含箭头辅助对象的线段部分.
.cone : Mesh
包含箭头辅助对象的锥体部分.
3)方法
请到基类 Object3D 页面查看公共方法.
.setColor (color : Color) : undefined
color -- 所需的颜色。
设置箭头辅助对象的颜色.
.setLength (length : Number, headLength : Number, headWidth : Number) : undefined
length -- 要设置的长度.
headLength -- 要设置的箭头头部(锥体)的长度.
headWidth -- The width of the head of the arrow.
设置箭头辅助对象的长度.
.setDirection (dir : Vector3) : undefined
dir -- 要设置的方向. 必须为单位向量.
设置箭头辅助对象的方向.
4)效果预览
- <!DOCTYPE html>
- <html lang="en">
-
- <head>
- <meta charset="UTF-8">
- <title>ThreeHelpers</title>
- <style>
- body {
- margin: 0;
- overflow: hidden;
- /* 隐藏body窗口区域滚动条 */
- }
- </style>
- <!--引入three.js三维引擎-->
- <script src="https://cdn.bootcss.com/three.js/92/three.js"></script>
-
- </head>
-
- <body>
- <script >
-
- var scene = new THREE.Scene();
- scene.background = new THREE.Color(0xcfcfcf);
- var camera = new THREE.PerspectiveCamera(75, window.innerWidth / window.innerHeight, 0.1, 1000);
- var renderer = new THREE.WebGLRenderer();
- renderer.setSize(window.innerWidth, window.innerHeight);
- document.body.appendChild(renderer.domElement);
-
- camera.position.z = 5;
-
- //来自原点的方向。必须是单位向量
- var dir = new THREE.Vector3(10, 10, 0);
-
- // 规格化方向向量(转换为长度为1的向量)
- dir.normalize();
-
- // 箭头开始的点
- var origin = new THREE.Vector3(0, 0, 0);
-
- // 箭头的长度。默认值为1
- var length = 3;
-
- // 用于定义颜色的十六进制值。默认值为0xffff00
- var hex = 0xff0000;
-
- // 箭头的长度。默认值为0.2 *length
- var headLength = 0.5;
-
- // 箭头宽度的长度。默认值为0.2 * headLength。
- var headWidth = 0.2;
-
- var arrowHelper = new THREE.ArrowHelper(dir, origin, length, hex,headLength,headWidth);
- scene.add(arrowHelper);
-
-
- animate();
-
- function animate () {
- requestAnimationFrame(animate);
- renderer.render(scene, camera);
- }
-
- </script>
- </body>
- </html>

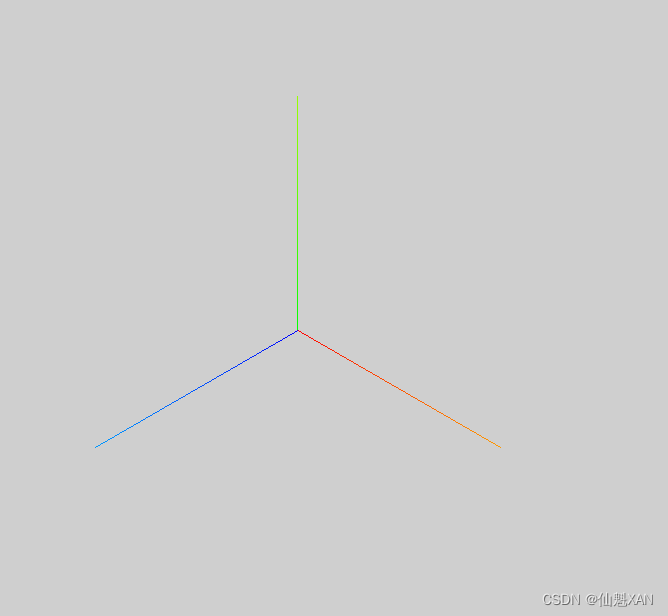
2、AxesHelper 轴坐标系辅助对象
用于简单模拟3个坐标轴的对象,红色代表 X 轴. 绿色代表 Y 轴. 蓝色代表 Z 轴
- const axesHelper = new THREE.AxesHelper( 5 );
- scene.add( axesHelper );
1)构造函数
AxesHelper( size : Number )
size -- (可选的) 表示代表轴的线段长度. 默认为 1.
2)属性
请到基类 LineSegments 页面查看公共属性.
3)方法
请到基类 LineSegments 页面查看公共方法.
4)效果预览
- <!DOCTYPE html>
- <html lang="en">
-
- <head>
- <meta charset="UTF-8">
- <title>ThreeHelpers</title>
- <style>
- body {
- margin: 0;
- overflow: hidden;
- /* 隐藏body窗口区域滚动条 */
- }
- </style>
- <!--引入three.js三维引擎-->
- <script src="https://cdn.bootcss.com/three.js/92/three.js"></script>
-
- </head>
-
- <body>
- <script >
-
- var scene = new THREE.Scene();
- scene.background = new THREE.Color(0xcfcfcf);
- var camera = new THREE.PerspectiveCamera(75, window.innerWidth / window.innerHeight, 0.1, 1000);
- var renderer = new THREE.WebGLRenderer();
- renderer.setSize(window.innerWidth, window.innerHeight);
- document.body.appendChild(renderer.domElement);
-
- camera.position.x = 8;
- camera.position.y = 8;
- camera.position.z = 8;
- camera.lookAt(scene.position)
-
- const axesHelper = new THREE.AxesHelper( 5 );
- scene.add( axesHelper );
-
-
- animate();
-
- function animate () {
- requestAnimationFrame(animate);
- renderer.render(scene, camera);
- }
-
- </script>
- </body>
- </html>

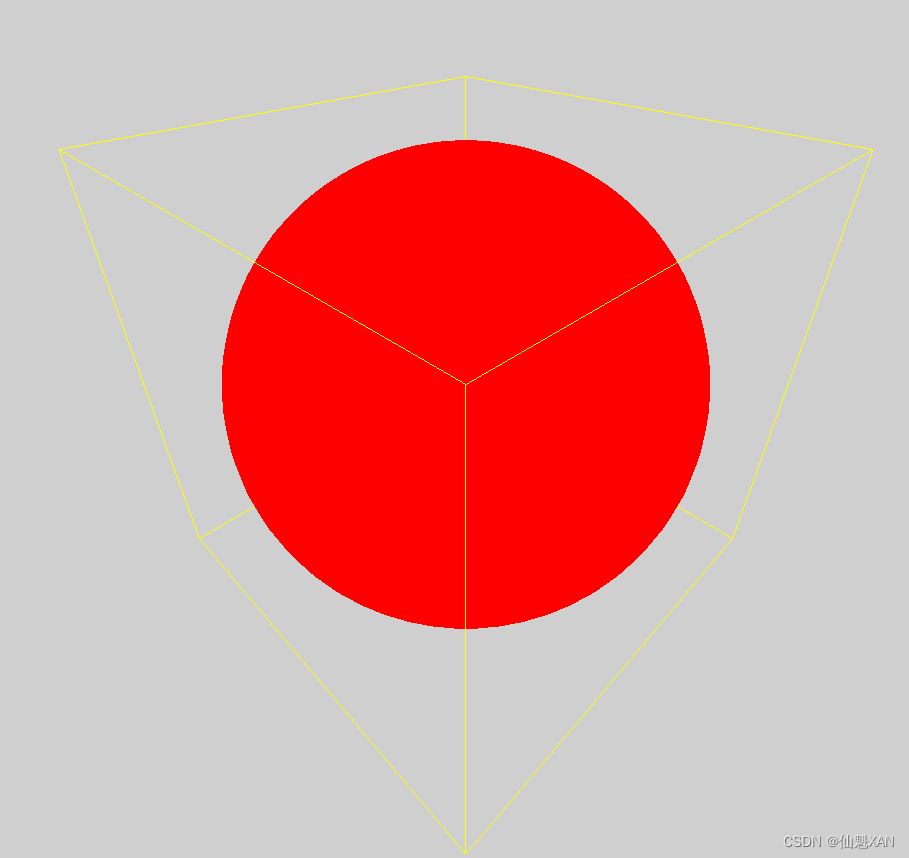
3、BoxHelper 包围盒辅助对象
用于图形化地展示对象世界轴心对齐的包围盒的辅助对象。The actual bounding box is handled with Box3, this is just a visual helper for debugging. It can be automatically resized with the BoxHelper.update method when the object it's created from is transformed. 注意:要想能正常运行,目标对象必须包含 BufferGeometry , 所以当目标对象是精灵 Sprites 时将不能正常运行.
- const sphere = new THREE.SphereGeometry();
- const object = new THREE.Mesh( sphere, new THREE.MeshBasicMaterial( 0xff0000 ) );
- const box = new THREE.BoxHelper( object, 0xffff00 );
- scene.add( box );
1)构造函数
BoxHelper( object : Object3D, color : Color )
object -- (可选的) 被展示世界轴心对齐的包围盒的对象.
color -- (可选的) 线框盒子的16进制颜色值. 默认为 0xffff00.
创建一个新的线框盒子包围指定的对象. 内部使用 Box3.setFromObject 方法来计算尺寸. 注意:此线框盒子将包围对象的所有子对象.
2)属性
请到基类 LineSegments 页面查看公共属性.
3)方法
请到基类 LineSegments 页面查看公共方法.
.update () : undefined
更新辅助对象的几何体,与目标对象尺寸 保持一致, 包围目标对象所有子对象. 请查看 Box3.setFromObject.
.setFromObject ( object : Object3D ) : this
object - 用于创建辅助对象的目标 Object3D 对象.
更新指定对象的线框盒子.
4)效果预览
- <!DOCTYPE html>
- <html lang="en">
-
- <head>
- <meta charset="UTF-8">
- <title>ThreeHelpers</title>
- <style>
- body {
- margin: 0;
- overflow: hidden;
- /* 隐藏body窗口区域滚动条 */
- }
- </style>
- <!--引入three.js三维引擎-->
- <script src="https://cdn.bootcss.com/three.js/92/three.js"></script>
-
- </head>
-
- <body>
- <script >
-
- var scene = new THREE.Scene();
- scene.background = new THREE.Color(0xcfcfcf);
- var camera = new THREE.PerspectiveCamera(75, window.innerWidth / window.innerHeight, 0.1, 1000);
- var renderer = new THREE.WebGLRenderer();
- renderer.setSize(window.innerWidth, window.innerHeight);
- document.body.appendChild(renderer.domElement);
-
- camera.position.x = 8;
- camera.position.y = 8;
- camera.position.z = 8;
- camera.lookAt(scene.position)
-
- const sphere = new THREE.SphereGeometry(5,60,60);
- const object = new THREE.Mesh( sphere, new THREE.MeshBasicMaterial( {color:0xff0000} ) );
- const box = new THREE.BoxHelper( object, 0xffff00 );
- scene.add( object );
- scene.add( box );
-
-
- animate();
-
- function animate () {
- requestAnimationFrame(animate);
- renderer.render(scene, camera);
- }
-
- </script>
- </body>
- </html>

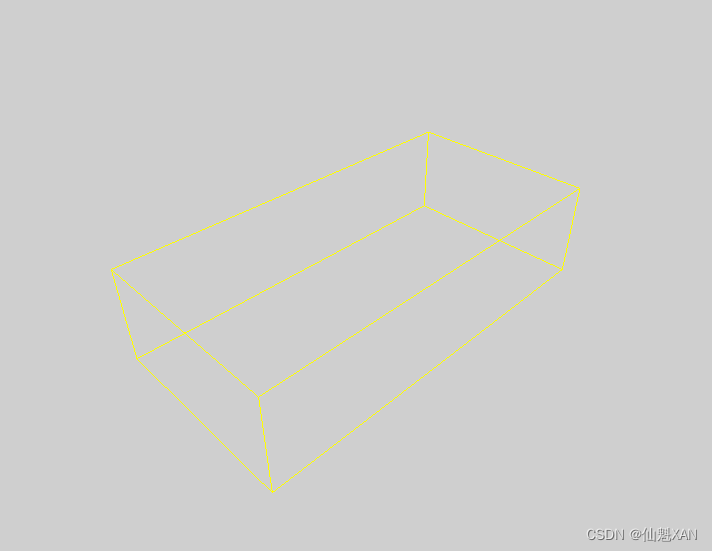
4、Box3Helper 模拟3维包围盒辅助对象
模拟3维包围盒 Box3 的辅助对象
- const box = new THREE.Box3();
- box.setFromCenterAndSize( new THREE.Vector3( 1, 1, 1 ), new THREE.Vector3( 2, 1, 3 ) );
-
- const helper = new THREE.Box3Helper( box, 0xffff00 );
- scene.add( helper );
1)构造函数
Box3Helper( box : Box3, color : Color )
box -- 被模拟的3维包围盒.
color -- (可选的) 线框盒子的颜色. 默认为 0xffff00.
创建一个新的线框盒子用以表示指定的3维包围盒.
2)属性
请到基类 LineSegments 页面查看公共属性.
.box : Box3
被模拟的3维包围盒.
3)方法
请到基类 LineSegments 页面查看公共方法.
.updateMatrixWorld ( force : Boolean ) : undefined
重写基类 Object3D 的该方法以便于 同时更新线框辅助对象与 .box 属性保持一致.
4)效果预览
- <!DOCTYPE html>
- <html lang="en">
-
- <head>
- <meta charset="UTF-8">
- <title>ThreeHelpers</title>
- <style>
- body {
- margin: 0;
- overflow: hidden;
- /* 隐藏body窗口区域滚动条 */
- }
- </style>
- <!--引入three.js三维引擎-->
- <script src="https://cdn.bootcss.com/three.js/92/three.js"></script>
-
- </head>
-
- <body>
- <script >
-
- var scene = new THREE.Scene();
- scene.background = new THREE.Color(0xcfcfcf);
- var camera = new THREE.PerspectiveCamera(75, window.innerWidth / window.innerHeight, 0.1, 1000);
- var renderer = new THREE.WebGLRenderer();
- renderer.setSize(window.innerWidth, window.innerHeight);
- document.body.appendChild(renderer.domElement);
-
- camera.position.x = 8;
- camera.position.y = 8;
- camera.position.z = 8;
- camera.lookAt(scene.position)
-
- const box = new THREE.Box3();
- box.setFromCenterAndSize( new THREE.Vector3( 1, 1, 1 ), new THREE.Vector3( 4, 2, 8 ) );
-
- const helper = new THREE.Box3Helper( box, 0xffff00 );
- scene.add( helper );
-
-
- animate();
-
- function animate () {
- requestAnimationFrame(animate);
- renderer.render(scene, camera);
- }
-
- </script>
- </body>
- </html>

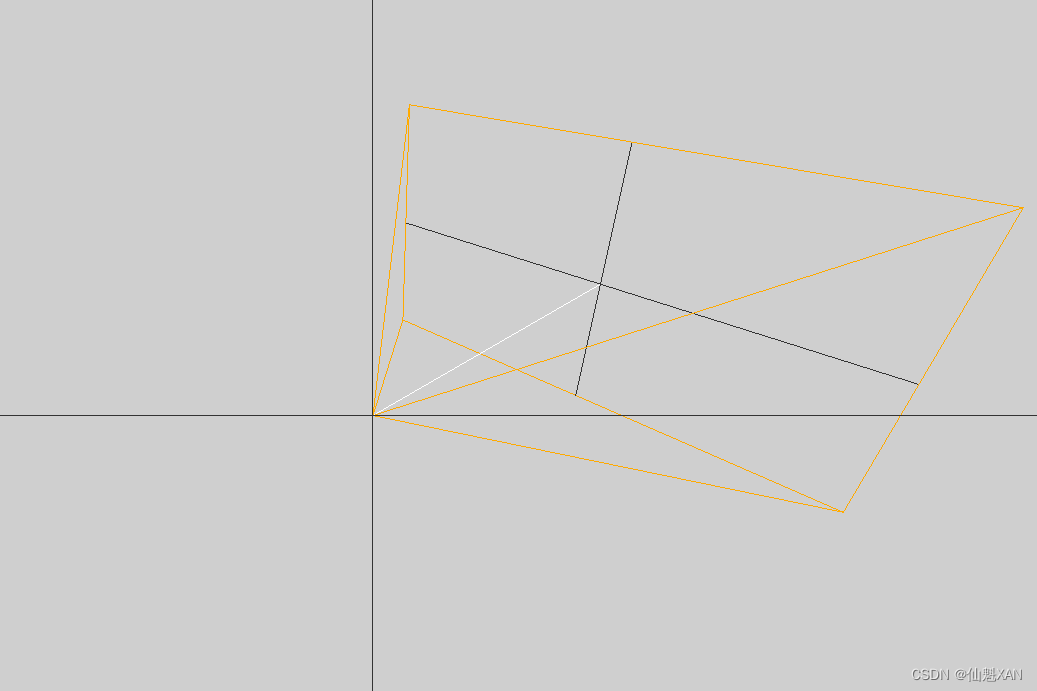
5、 CameraHelper 相机视锥体辅助对象
用于模拟相机视锥体的辅助对象,它使用 LineSegments 来模拟相机视锥体。
- const camera = new THREE.PerspectiveCamera( 75, window.innerWidth / window.innerHeight, 0.1, 1000 );
- const helper = new THREE.CameraHelper( camera );
- scene.add( helper );
1)构造函数
CameraHelper( camera : Camera )
camera -- 被模拟的相机.
为指定相机创建一个新的相机辅助对象 CameraHelper .
2)属性
请到基类 LineSegments 页面查看公共属性.
.camera : Camera
被模拟的相机.
.pointMap : Object
包含用于模拟相机的点.
.matrix : Object
请参考相机的世界矩阵 camera.matrixWorld.
.matrixAutoUpdate : Object
请查看 Object3D.matrixAutoUpdate. 这里设置为 false 表示辅助对象 使用相机的 matrixWorld.
3)方法
请到基类 LineSegments 页面查看公共方法.
.update () : undefined
基于相机的投影矩阵更新辅助对象.
4)效果预览
- <!DOCTYPE html>
- <html lang="en">
-
- <head>
- <meta charset="UTF-8">
- <title>ThreeHelpers</title>
- <style>
- body {
- margin: 0;
- overflow: hidden;
- /* 隐藏body窗口区域滚动条 */
- }
- </style>
- <!--引入three.js三维引擎-->
- <script src="https://cdn.bootcss.com/three.js/92/three.js"></script>
-
- </head>
-
- <body>
- <script >
-
- var scene = new THREE.Scene();
- scene.background = new THREE.Color(0xcfcfcf);
- var camera = new THREE.PerspectiveCamera(75, window.innerWidth / window.innerHeight, 0.1, 1000);
- var renderer = new THREE.WebGLRenderer();
- renderer.setSize(window.innerWidth, window.innerHeight);
- document.body.appendChild(renderer.domElement);
-
- camera.position.x = 80;
- camera.position.y = 80;
- camera.position.z = 80;
- camera.lookAt(scene.position)
-
- const helper = new THREE.CameraHelper( camera );
- scene.add( helper );
- const camera1 = new THREE.PerspectiveCamera( 45, window.innerWidth / window.innerHeight, 0.1, 100 );
- camera1.rotation.y = Math.PI / 2
- const helper1 = new THREE.CameraHelper( camera1 );
- scene.add( helper1 );
-
- animate();
-
- function animate () {
- requestAnimationFrame(animate);
- renderer.render(scene, camera);
- }
-
- </script>
- </body>
- </html>

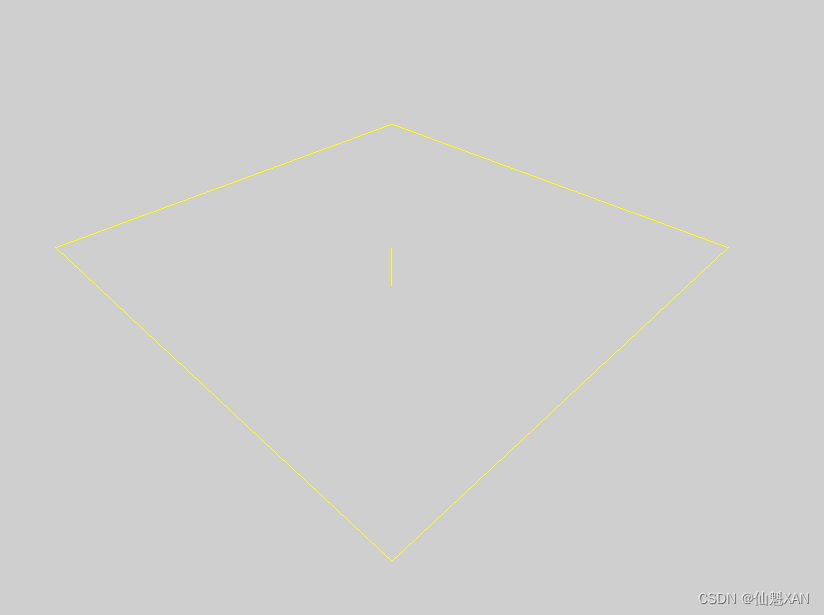
6、DirectionalLightHelper 平行光的辅助对象
用于模拟场景中平行光 DirectionalLight 的辅助对象. 其中包含了表示光位置的平面和表示光方向的线段.
- const light = new THREE.DirectionalLight( 0xFFFFFF );
- const helper = new THREE.DirectionalLightHelper( light, 5 );
- scene.add( helper );
1)构造函数
DirectionalLightHelper( light : DirectionalLight, size : Number, color : Hex )
light-- 被模拟的光源.
size -- (可选的) 平面的尺寸. 默认为 1.
color -- (可选的) 如果没有设置颜色将使用光源的颜色.
2)属性
请到基类 Object3D 页面查看公共属性.
.lightPlane : Line
包含表示平行光方向的线网格.
.light : DirectionalLight
被模拟的光源. 请参考 directionalLight .
.matrix : Object
请参考光源的世界矩阵 matrixWorld.
.matrixAutoUpdate : Object
请查看 Object3D.matrixAutoUpdate 页面. 这里设置为 false 表示辅助对象 使用光源的 matrixWorld.
.color : hex
构造函数中传入的颜色值. 默认为 undefined. 如果改变该值, 辅助对象的颜色将在下一次 update 被调用时更新.
3)方法
请到基类 Object3D 页面查看公共方法.
.dispose () : undefined
销毁该平行光辅助对象.
.update () : undefined
更新辅助对象,与模拟的 directionalLight 光源的位置和方向保持一致.
4)效果预览
- <!DOCTYPE html>
- <html lang="en">
-
- <head>
- <meta charset="UTF-8">
- <title>ThreeHelpers</title>
- <style>
- body {
- margin: 0;
- overflow: hidden;
- /* 隐藏body窗口区域滚动条 */
- }
- </style>
- <!--引入three.js三维引擎-->
- <script src="https://cdn.bootcss.com/three.js/92/three.js"></script>
-
- </head>
-
- <body>
- <script >
-
- var scene = new THREE.Scene();
- scene.background = new THREE.Color(0xcfcfcf);
- var camera = new THREE.PerspectiveCamera(75, window.innerWidth / window.innerHeight, 0.1, 1000);
- var renderer = new THREE.WebGLRenderer();
- renderer.setSize(window.innerWidth, window.innerHeight);
- document.body.appendChild(renderer.domElement);
-
- camera.position.x = 8;
- camera.position.y = 8;
- camera.position.z = 8;
- camera.lookAt(scene.position)
-
- const light = new THREE.DirectionalLight( 0xFFFF00 );
- const helper = new THREE.DirectionalLightHelper( light, 5 );
- scene.add( helper );
-
- animate();
-
- function animate () {
- requestAnimationFrame(animate);
- renderer.render(scene, camera);
- }
-
- </script>
- </body>
- </html>

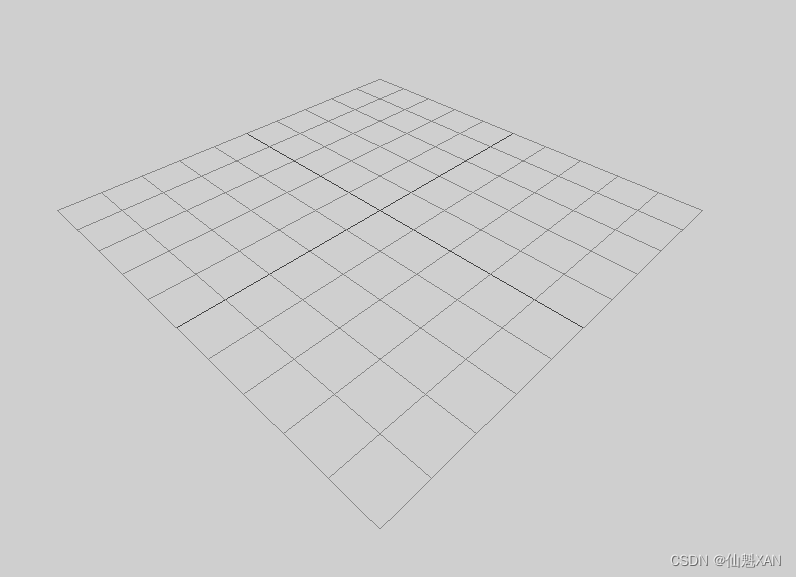
7、GridHelper 坐标网格辅助对象
坐标格辅助对象. 坐标格实际上是2维线数组
- const size = 10;
- const divisions = 10;
-
- const gridHelper = new THREE.GridHelper( size, divisions );
- scene.add( gridHelper );
1)构造函数
GridHelper( size : number, divisions : Number, colorCenterLine : Color, colorGrid : Color )
size -- 坐标格尺寸. 默认为 10.
divisions -- 坐标格细分次数. 默认为 10.
colorCenterLine -- 中线颜色. 值可以为 Color 类型, 16进制 和 CSS 颜色名. 默认为 0x444444
colorGrid -- 坐标格网格线颜色. 值可以为 Color 类型, 16进制 和 CSS 颜色名. 默认为 0x888888
创建一个尺寸为 'size' 和 每个维度细分 'divisions' 次的坐标格. 颜色可选.
2)效果预览
- <!DOCTYPE html>
- <html lang="en">
-
- <head>
- <meta charset="UTF-8">
- <title>ThreeHelpers</title>
- <style>
- body {
- margin: 0;
- overflow: hidden;
- /* 隐藏body窗口区域滚动条 */
- }
- </style>
- <!--引入three.js三维引擎-->
- <script src="https://cdn.bootcss.com/three.js/92/three.js"></script>
-
- </head>
-
- <body>
- <script >
-
- var scene = new THREE.Scene();
- scene.background = new THREE.Color(0xcfcfcf);
- var camera = new THREE.PerspectiveCamera(75, window.innerWidth / window.innerHeight, 0.1, 1000);
- var renderer = new THREE.WebGLRenderer();
- renderer.setSize(window.innerWidth, window.innerHeight);
- document.body.appendChild(renderer.domElement);
-
- camera.position.x = 8;
- camera.position.y = 8;
- camera.position.z = 8;
- camera.lookAt(scene.position)
-
- const size = 10;
- const divisions = 10;
- const gridHelper = new THREE.GridHelper( size, divisions );
- scene.add( gridHelper );
-
- animate();
-
- function animate () {
- requestAnimationFrame(animate);
- renderer.render(scene, camera);
- }
-
- </script>
- </body>
- </html>

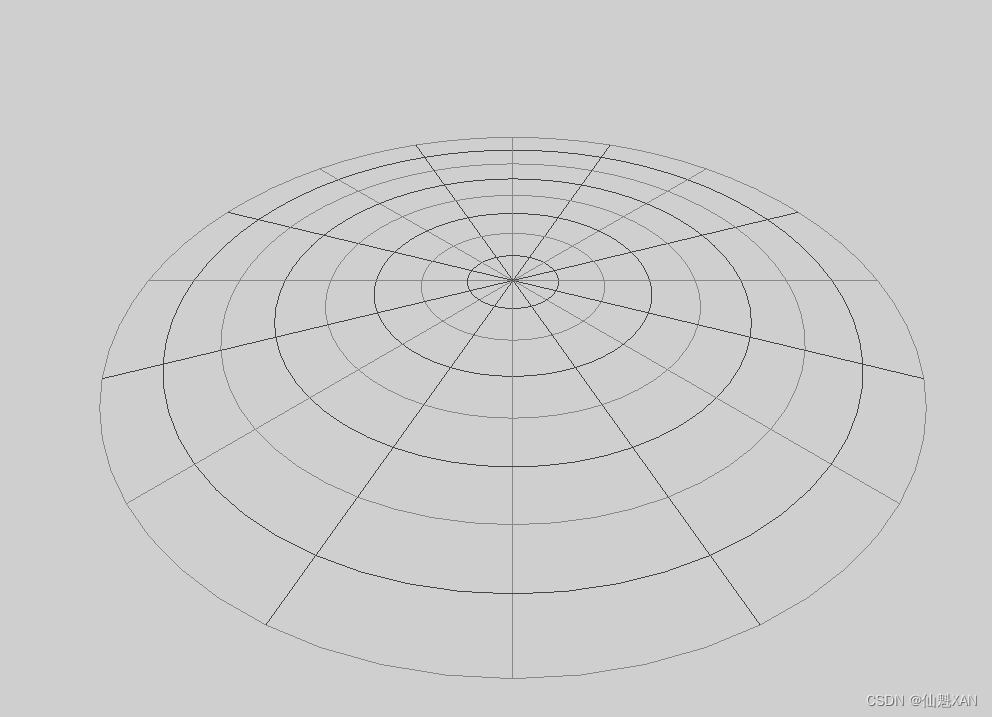
8、PolarGridHelper 极坐标格辅助对象
极坐标格辅助对象. 坐标格实际上是2维线数组
- const radius = 10;
- const radials = 16;
- const circles = 8;
- const divisions = 64;
-
- const helper = new THREE.PolarGridHelper( radius, radials, circles, divisions );
- scene.add( helper );
1)构造函数
PolarGridHelper( radius : Number, radials : Number, circles : Number, divisions : Number, color1 : Color, color2 : Color )
radius -- 极坐标格半径. 可以为任何正数. 默认为 10.
radials -- 径向辐射线数量. 可以为任何正整数. 默认为 16.
circles -- 圆圈的数量. 可以为任何正整数. 默认为 8.
divisions -- 圆圈细分段数. 可以为任何大于或等于3的正整数. 默认为 64.
color1 -- 极坐标格使用的第一个颜色. 值可以为 Color 类型, 16进制 和 CSS 颜色名. 默认为 0x444444
color2 -- 极坐标格使用的第二个颜色. 值可以为 Color 类型, 16进制 和 CSS 颜色名. 默认为 0x888888
创建一个半径为'radius' 包含 'radials' 条径向辐射线 和 'circles' 个细分成 'divisions' 段的圆圈的极坐标格辅助对象. 颜色可选.
2)效果预览
- <!DOCTYPE html>
- <html lang="en">
-
- <head>
- <meta charset="UTF-8">
- <title>ThreeHelpers</title>
- <style>
- body {
- margin: 0;
- overflow: hidden;
- /* 隐藏body窗口区域滚动条 */
- }
- </style>
- <!--引入three.js三维引擎-->
- <script src="https://cdn.bootcss.com/three.js/92/three.js"></script>
-
- </head>
-
- <body>
- <script >
-
- var scene = new THREE.Scene();
- scene.background = new THREE.Color(0xcfcfcf);
- var camera = new THREE.PerspectiveCamera(75, window.innerWidth / window.innerHeight, 0.1, 1000);
- var renderer = new THREE.WebGLRenderer();
- renderer.setSize(window.innerWidth, window.innerHeight);
- document.body.appendChild(renderer.domElement);
-
- camera.position.x = 8;
- camera.position.y = 8;
- camera.position.z = 8;
- camera.lookAt(scene.position)
-
- const radius = 8;
- const radials = 16;
- const circles = 8;
- const divisions = 64;
- const helper = new THREE.PolarGridHelper( radius, radials, circles, divisions );
- scene.add( helper );
-
- animate();
-
- function animate () {
- requestAnimationFrame(animate);
- renderer.render(scene, camera);
- }
-
- </script>
- </body>
- </html>

9、HemisphereLightHelper 半球形光源网格辅助对象
创建一个虚拟的球形网格 Mesh 的辅助对象来模拟 半球形光源 HemisphereLight.
- const light = new THREE.HemisphereLight( 0xffffbb, 0x080820, 1 );
- const helper = new THREE.HemisphereLightHelper( light, 5 );
- scene.add( helper );
1)构造函数
HemisphereLightHelper( light : HemisphereLight, sphereSize : Number, color : Hex )
light -- 被模拟的光源.
size -- 用于模拟光源的网格尺寸.
color -- (可选的) 如果没有赋值辅助对象将使用光源的颜色.
2)属性
请到基类 Object3D 页面查看公共属性.
.light : HemisphereLight
被模拟的半球形光源.
.matrix : Object
请参考半球形光源的世界矩阵 matrixWorld.
.matrixAutoUpdate : Object
请查看 Object3D.matrixAutoUpdate. 这里设置为 false 表示辅助对象 使用半球形光源的 matrixWorld.
.color : hex
构造函数中传入的颜色值. 默认为 undefined. 如果改变该值, 辅助对象的颜色将在下一次 update 被调用时更新.
3)方法
请到基类 Object3D 页面查看公共方法.
.dispose () : undefined
销毁该半球形光源辅助对象.
.update () : undefined
更新辅助对象,与 .light 属性的位置和方向保持一致.
4)效果预览

- <!DOCTYPE html>
- <html lang="en">
-
- <head>
- <meta charset="UTF-8">
- <title>ThreeHelpers</title>
- <style>
- body {
- margin: 0;
- overflow: hidden;
- /* 隐藏body窗口区域滚动条 */
- }
- </style>
- <!--引入three.js三维引擎-->
- <script src="https://cdn.bootcss.com/three.js/92/three.js"></script>
-
- </head>
-
- <body>
- <script >
-
- var scene = new THREE.Scene();
- scene.background = new THREE.Color(0xcfcfcf);
- var camera = new THREE.PerspectiveCamera(75, window.innerWidth / window.innerHeight, 0.1, 1000);
- var renderer = new THREE.WebGLRenderer();
- renderer.setSize(window.innerWidth, window.innerHeight);
- document.body.appendChild(renderer.domElement);
-
- camera.position.x = 8;
- camera.position.y = 8;
- camera.position.z = 8;
- camera.lookAt(scene.position)
-
- const light = new THREE.HemisphereLight( 0xffffbb, 0x080820, 1 );
- const helper = new THREE.HemisphereLightHelper( light, 5 );
- scene.add( helper );
-
- animate();
-
- function animate () {
- requestAnimationFrame(animate);
- renderer.render(scene, camera);
- }
-
- </script>
- </body>
- </html>

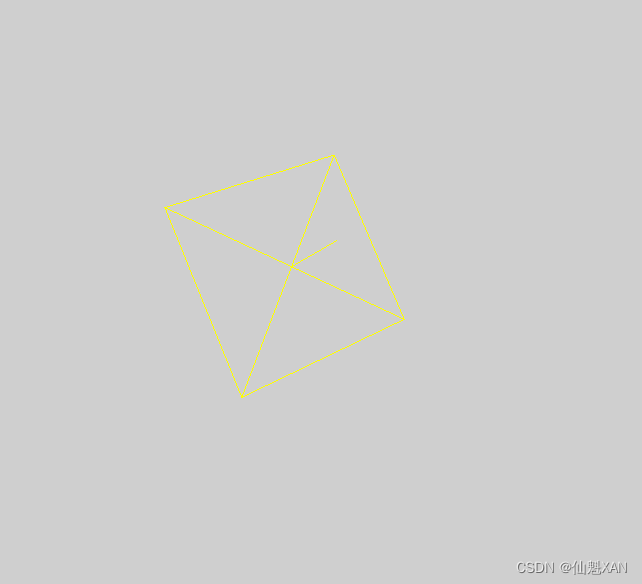
10、PlaneHelper 平面辅助对象
用于模拟平面 Plane 的辅助对象
- const plane = new THREE.Plane( new THREE.Vector3( 1, 1, 0.2 ), 3 );
- const helper = new THREE.PlaneHelper( plane, 1, 0xffff00 );
- scene.add( helper );
1)构造函数
PlaneHelper( plane : Plane, size : Float, hex : Color )
plane -- 被模拟的平面.
size -- (可选的) 辅助对象的单边长度. 默认为 1.
color -- (可选的) 辅助对象的颜色. 默认为 0xffff00.
创建一个线框辅助对象来表示指定平面.
2)属性
请到基类 LineSegments 页面查看公共属性.
.plane : Plane
被模拟的平面 plane .
.size : Float
辅助对象的单边长度.
3)方法
请到基类 LineSegments 页面查看公共方法.
.updateMatrixWorld ( force : Boolean ) : undefined
重写基类 Object3D 的该方法以便于 同时更新线框辅助对象与 .plane 和 .size 属性保持一致.
4)效果预览
- <!DOCTYPE html>
- <html lang="en">
-
- <head>
- <meta charset="UTF-8">
- <title>ThreeHelpers</title>
- <style>
- body {
- margin: 0;
- overflow: hidden;
- /* 隐藏body窗口区域滚动条 */
- }
- </style>
- <!--引入three.js三维引擎-->
- <script src="https://cdn.bootcss.com/three.js/92/three.js"></script>
-
- </head>
-
- <body>
- <script >
-
- var scene = new THREE.Scene();
- scene.background = new THREE.Color(0xcfcfcf);
- var camera = new THREE.PerspectiveCamera(75, window.innerWidth / window.innerHeight, 0.1, 1000);
- var renderer = new THREE.WebGLRenderer();
- renderer.setSize(window.innerWidth, window.innerHeight);
- document.body.appendChild(renderer.domElement);
-
- camera.position.x = 8;
- camera.position.y = 8;
- camera.position.z = 8;
- camera.lookAt(scene.position)
-
- const plane = new THREE.Plane( new THREE.Vector3( 1, 1, 0.2 ), 3 );
- const helper = new THREE.PlaneHelper( plane, 5, 0xffff00 );
- scene.add( helper );
-
- animate();
-
- function animate () {
- requestAnimationFrame(animate);
- renderer.render(scene, camera);
- }
-
- </script>
- </body>
- </html>

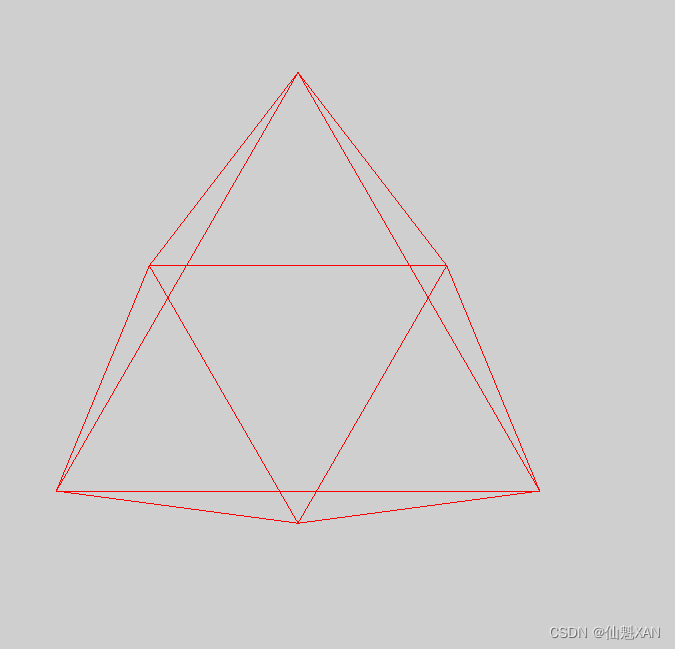
11、PointLightHelper 点光源菱形网格辅助对象
创建一个虚拟的球形网格 Mesh 的辅助对象来模拟 点光源 PointLight.
- const pointLight = new THREE.PointLight( 0xff0000, 1, 100 );
- pointLight.position.set( 10, 10, 10 );
- scene.add( pointLight );
-
- const sphereSize = 1;
- const pointLightHelper = new THREE.PointLightHelper( pointLight, sphereSize );
- scene.add( pointLightHelper );
1)构造函数
PointLightHelper( light : PointLight, sphereSize : Float, color : Hex )
light -- 要模拟的光源.
sphereSize -- (可选的) 球形辅助对象的尺寸. 默认为 1.
color -- (可选的) 如果没有赋值辅助对象将使用光源的颜色.
2)属性
请到基类 Mesh 页面查看公共属性.
.light : PointLight
被模拟的点光源 PointLight .
.matrix : Object
请参考点光源的世界矩阵 matrixWorld.
.matrixAutoUpdate : Object
请查看 Object3D.matrixAutoUpdate. 这里设置为 false 表示辅助对象 使用点光源的 matrixWorld.
.color : hex
构造函数中传入的颜色值. 默认为 undefined. 如果改变该值, 辅助对象的颜色将在下一次 update 被调用时更新.
3)方法
请到基类 Mesh 页面查看公共方法.
.dispose () : undefined
销毁该点光源辅助对象.
.update () : undefined
更新辅助对象,与 .light 属性的位置保持一致.
4)效果预览
- <!DOCTYPE html>
- <html lang="en">
-
- <head>
- <meta charset="UTF-8">
- <title>ThreeHelpers</title>
- <style>
- body {
- margin: 0;
- overflow: hidden;
- /* 隐藏body窗口区域滚动条 */
- }
- </style>
- <!--引入three.js三维引擎-->
- <script src="https://cdn.bootcss.com/three.js/92/three.js"></script>
-
- </head>
-
- <body>
- <script >
-
- var scene = new THREE.Scene();
- scene.background = new THREE.Color(0xcfcfcf);
- var camera = new THREE.PerspectiveCamera(75, window.innerWidth / window.innerHeight, 0.1, 1000);
- var renderer = new THREE.WebGLRenderer();
- renderer.setSize(window.innerWidth, window.innerHeight);
- document.body.appendChild(renderer.domElement);
-
- camera.position.x = 8;
- camera.position.y = 8;
- camera.position.z = 8;
- camera.lookAt(scene.position)
-
- const pointLight = new THREE.PointLight( 0xff0000, 1, 100 );
- pointLight.position.set( 1, 1, 1 );
- scene.add( pointLight );
-
- const sphereSize = 5;
- const pointLightHelper = new THREE.PointLightHelper( pointLight, sphereSize );
- scene.add( pointLightHelper );
-
- animate();
-
- function animate () {
- requestAnimationFrame(animate);
- renderer.render(scene, camera);
- }
-
- </script>
- </body>
- </html>

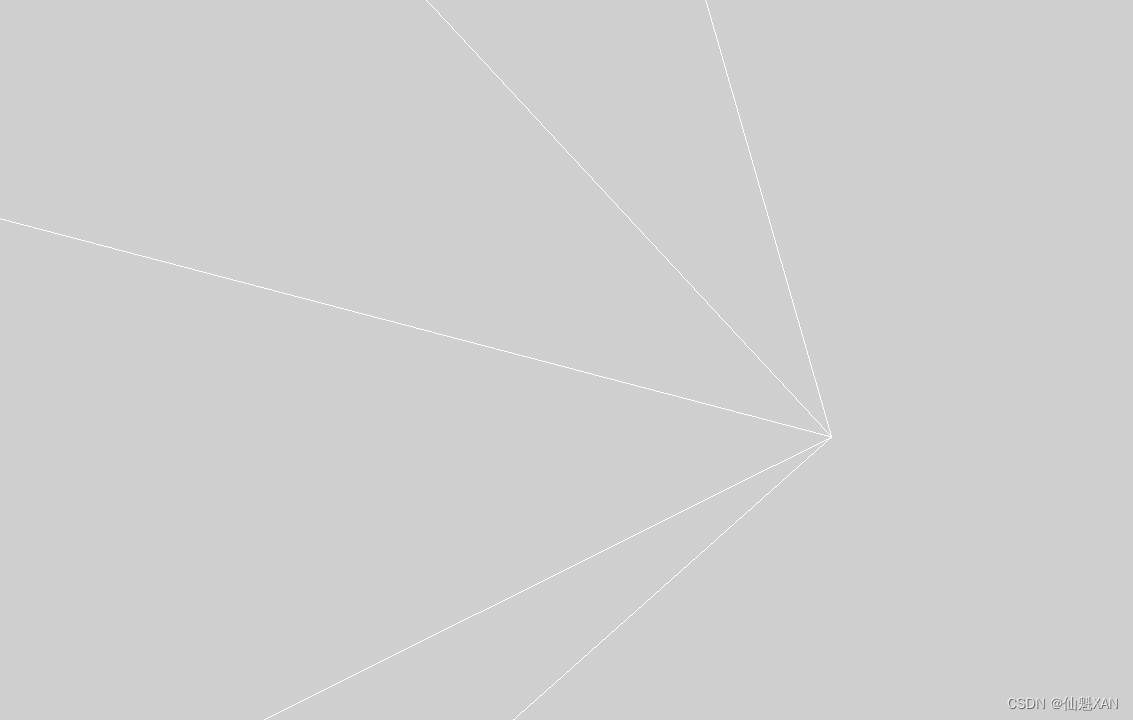
12、SpotLightHelper 聚光灯锥形辅助对象
用于模拟聚光灯 SpotLight 的锥形辅助对象.
- const spotLight = new THREE.SpotLight( 0xffffff );
- spotLight.position.set( 10, 10, 10 );
- scene.add( spotLight );
-
- const spotLightHelper = new THREE.SpotLightHelper( spotLight );
- scene.add( spotLightHelper );
1)构造函数
SpotLightHelper( light : SpotLight, color : Hex )
light -- 被模拟的聚光灯 SpotLight .
color -- (可选的) 如果没有赋值辅助对象将使用光源的颜色.
2)属性
请到基类 Object3D 页面查看公共属性.
.cone : LineSegments
用于模拟光源的 LineSegments 类型对象.
.light : SpotLight
被模拟的聚光灯 SpotLight .
.matrix : Object
请参考聚光灯的世界矩阵 matrixWorld.
.matrixAutoUpdate : Object
请查看 Object3D.matrixAutoUpdate. 这里设置为 false 表示辅助对象 使用聚光灯的 matrixWorld.
.color : hex
构造函数中传入的颜色值. 默认为 undefined. 如果改变该值, 辅助对象的颜色将在下一次 update 被调用时更新.
3)方法
请到基类 Object3D 页面查看公共属性.
.dispose () : undefined
销毁该聚光灯辅助对象.
.update () : undefined
更新聚光灯辅助对象.
4)效果预览
- <!DOCTYPE html>
- <html lang="en">
-
- <head>
- <meta charset="UTF-8">
- <title>ThreeHelpers</title>
- <style>
- body {
- margin: 0;
- overflow: hidden;
- /* 隐藏body窗口区域滚动条 */
- }
- </style>
- <!--引入three.js三维引擎-->
- <script src="https://cdn.bootcss.com/three.js/92/three.js"></script>
-
- </head>
-
- <body>
- <script >
-
- var scene = new THREE.Scene();
- scene.background = new THREE.Color(0xcfcfcf);
- var camera = new THREE.PerspectiveCamera(75, window.innerWidth / window.innerHeight, 0.1, 1000);
- var renderer = new THREE.WebGLRenderer();
- renderer.setSize(window.innerWidth, window.innerHeight);
- document.body.appendChild(renderer.domElement);
-
- camera.position.x = 8;
- camera.position.y = 8;
- camera.position.z = 8;
- camera.lookAt(scene.position)
-
- const spotLight = new THREE.SpotLight( 0xffffff );
- spotLight.position.set( 8,0,-3 );
- scene.add( spotLight );
- const spotLightHelper = new THREE.SpotLightHelper( spotLight );
- scene.add( spotLightHelper );
- animate();
-
- function animate () {
- requestAnimationFrame(animate);
- renderer.render(scene, camera);
- }
-
- </script>
- </body>
- </html>

13、RectAreaLightHelper 矩形光辅助对象
创建一个表示 RectAreaLight 的辅助对象.
- const light = new THREE.RectAreaLight( 0xffffbb, 1.0, 5, 5 );
- const helper = new RectAreaLightHelper( light );
- scene.add( helper );
1)构造函数
RectAreaLightHelper( light : RectAreaLight, color : Hex )
light -- 被模拟的光源.
color -- (可选) 如果没有赋值辅助对象将使用光源的颜色.
2)属性
请到基类 Object3D 页面查看公共属性.
.light : RectAreaLight
被模拟的区域光源.
.color : hex
构造函数中传入的颜色值. 默认为 undefined. 如果改变该值, 辅助对象的颜色将在下一次 update 被调用时更新.
3)方法
请到基类 Object3D 页面查看公共方法.
.dispose () : undefined
销毁该区域光源辅助对象.
4)效果预览
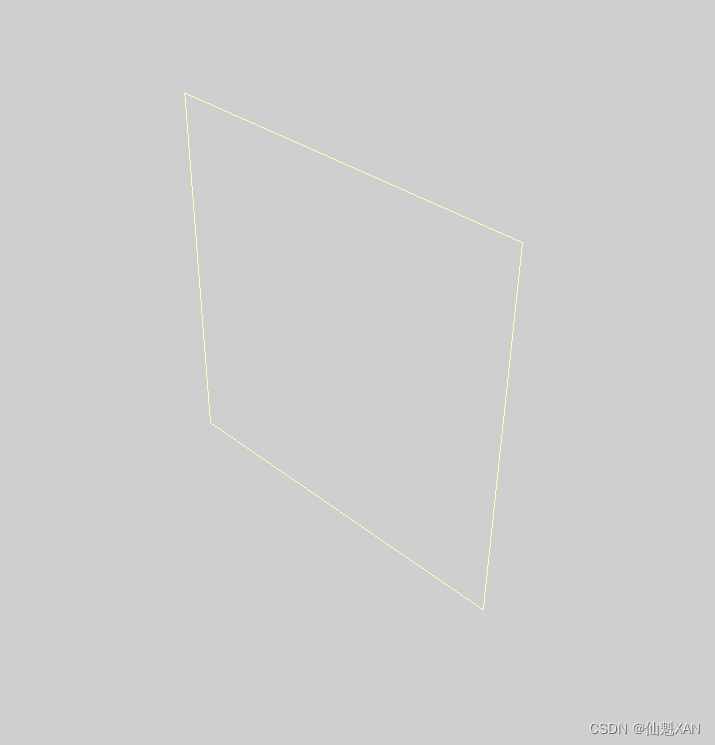
- <!DOCTYPE html>
- <html lang="en">
-
- <head>
- <meta charset="UTF-8">
- <title>ThreeHelpers</title>
- <style>
- body {
- margin: 0;
- overflow: hidden;
- /* 隐藏body窗口区域滚动条 */
- }
- </style>
- <!--引入three.js三维引擎-->
- <script src="https://cdn.bootcss.com/three.js/92/three.js"></script>
-
- </head>
-
- <body>
- <script>
-
- var scene = new THREE.Scene();
- scene.background = new THREE.Color(0xcfcfcf);
- var camera = new THREE.PerspectiveCamera(45, window.innerWidth / window.innerHeight, 0.1, 1000);
- var renderer = new THREE.WebGLRenderer();
- renderer.setSize(window.innerWidth, window.innerHeight);
- document.body.appendChild(renderer.domElement);
-
- camera.position.x = 8;
- camera.position.y = 8;
- camera.position.z = 8;
- camera.lookAt(scene.position)
-
- const light = new THREE.RectAreaLight( 0xffffbb, 1.0, 5, 5 );
- const helper = new THREE.RectAreaLightHelper( light );
- scene.add( helper );
-
- animate();
-
- function animate () {
- requestAnimationFrame(animate);
- renderer.render(scene, camera);
- }
-
- </script>
- </body>
- </html>

14、SkeletonHelper 骨骼辅助对象
用来模拟骨骼 Skeleton 的辅助对象. 该辅助对象使用 LineBasicMaterial 材质.
- const helper = new THREE.SkeletonHelper( skinnedMesh );
- scene.add( helper );
1)构造函数
SkeletonHelper( object : Object3D )
object -- Usually an instance of SkinnedMesh. However, any instance of Object3D can be used if it represents a hierarchy of Bones (via Object3D.children).
2)属性
.bones : Array
辅助对象使用 Lines 渲染的骨数组.
.isSkeletonHelper : Boolean
Read-only flag to check if a given object is of type SkeletonHelper.
.root : Object3D
构造函数传入的对象.
3)效果预览
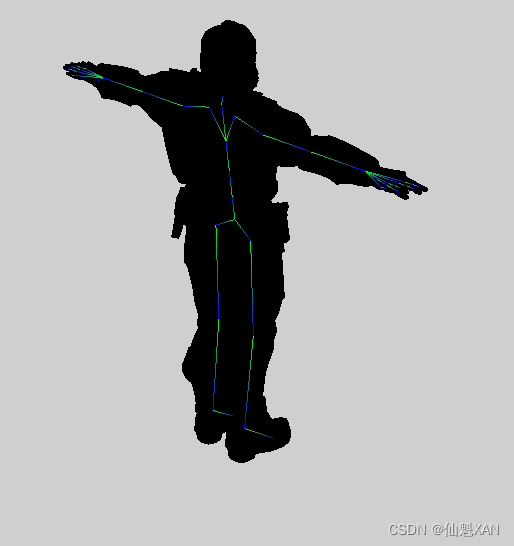
- <!DOCTYPE html>
- <html lang="en">
-
- <head>
- <meta charset="UTF-8">
- <title>ThreeHelpers</title>
- <style>
- body {
- margin: 0;
- overflow: hidden;
- /* 隐藏body窗口区域滚动条 */
- }
- </style>
- <!--引入three.js三维引擎-->
- <script src="https://cdn.bootcss.com/three.js/92/three.js"></script>
-
- </head>
-
- <body>
- <script type="importmap">
- {
- "imports": {
- "three": "./js/three.module.js"
- }
- }
- </script>
-
- <script type="module">
- import * as THREE from 'three';
- import { GLTFLoader } from './js/GLTFLoader.js';
-
- var scene = new THREE.Scene();
- scene.background = new THREE.Color(0xcfcfcf);
- var camera = new THREE.PerspectiveCamera(45, window.innerWidth / window.innerHeight, 0.1, 1000);
- var renderer = new THREE.WebGLRenderer();
- renderer.setSize(window.innerWidth, window.innerHeight);
- document.body.appendChild(renderer.domElement);
-
- camera.position.x = 3;
- camera.position.y = 3;
- camera.position.z = 3;
- camera.lookAt(scene.position)
-
- const loader = new GLTFLoader();
- loader.load( './models/Soldier.glb', function ( gltf ) {
-
- let model = gltf.scene;
- scene.add( model );
-
-
- let skeleton = new THREE.SkeletonHelper( model );
- scene.add( skeleton );
-
- animate();
- } );
-
-
-
- function animate () {
- requestAnimationFrame(animate);
- renderer.render(scene, camera);
- }
-
- </script>
- </body>
- </html>

15、VertexNormalsHelper 顶点的法线辅助对象
渲染箭头辅助对象 arrows 来模拟顶点的法线. 需要定义了法线缓存属性 custom attribute 或 使用了 computeVertexNormals 方法计算了顶点法线.
1)构造函数
VertexNormalsHelper( object : Object3D, size : Number, color : Hex, linewidth : Number )
object -- 要渲染顶点法线辅助的对象.
size -- (可选的) 箭头的长度. 默认为 1.
color -- 16进制颜色值. 默认为 0xff0000.
linewidth -- (可选的) 箭头线段的宽度. 默认为 1.
2)属性
请到基类 LineSegments 页面查看公共属性.
.matrixAutoUpdate : Object
请查看 Object3D.matrixAutoUpdate. 这里设置为 false 表示辅助对象 使用对象的世界矩阵 matrixWorld.
.object : Object3D
被渲染顶点法线辅助的对象.
.size : Number
箭头的长度. 默认为 1.
3)方法
请到基类 LineSegments 页面查看公共方法.
.update () : undefined
基于对象的运动更新顶点法线辅助对象.
4)效果预览
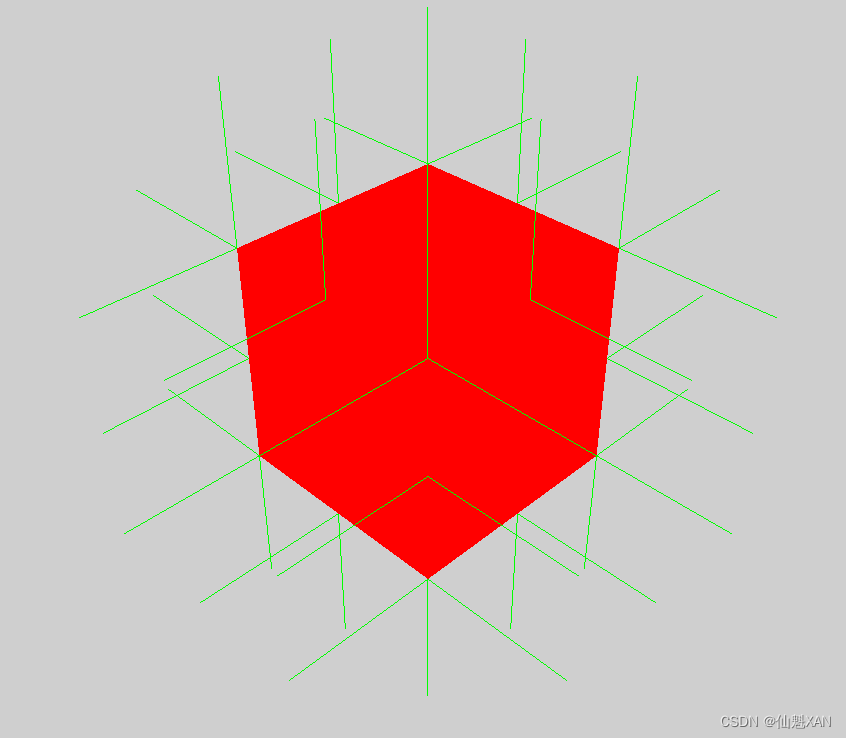
- <!DOCTYPE html>
- <html lang="en">
-
- <head>
- <meta charset="UTF-8">
- <title>ThreeHelpers</title>
- <style>
- body {
- margin: 0;
- overflow: hidden;
- /* 隐藏body窗口区域滚动条 */
- }
- </style>
- <!--引入three.js三维引擎-->
- <script src="https://cdn.bootcss.com/three.js/92/three.js"></script>
-
- </head>
-
- <body>
- <script>
-
- var scene = new THREE.Scene();
- scene.background = new THREE.Color(0xcfcfcf);
- var camera = new THREE.PerspectiveCamera(45, window.innerWidth / window.innerHeight, 0.1, 1000);
- var renderer = new THREE.WebGLRenderer();
- renderer.setSize(window.innerWidth, window.innerHeight);
- document.body.appendChild(renderer.domElement);
-
- camera.position.x = 8;
- camera.position.y = 8;
- camera.position.z = 8;
- camera.lookAt(scene.position)
-
-
- const geometry = new THREE.BoxGeometry( 3, 3, 3, 2, 2, 2 );
- const material = new THREE.MeshBasicMaterial( { color: 0xff0000 } );
- const box = new THREE.Mesh( geometry, material );
- const helper = new THREE.VertexNormalsHelper( box, 2, 0x00ff00, 1 );
- scene.add( box );
- scene.add( helper );
-
- animate();
-
- function animate () {
- requestAnimationFrame(animate);
- renderer.render(scene, camera);
- }
-
- </script>
- </body>
- </html>

16、VertexTangentsHelper 顶点切向量辅助对象
渲染箭头以可视化对象的顶点切向量。 要求切线已在自定义属性中指定或已使用computeTangents计算。
这个只支持BufferGeometry。
- const geometry = new THREE.BoxGeometry( 10, 10, 10, 2, 2, 2 );
- const material = new THREE.MeshNormalMaterial();
- const box = new THREE.Mesh( geometry, material );
-
- const helper = new VertexTangentsHelper( box, 1, 0x00ffff, 1 );
-
- scene.add( box );
- scene.add( helper );
1)Constructor
VertexTangentsHelper( object : Object3D, size : Number, color : Hex, linewidth : Number )
object -- object for which to render vertex tangents.
size -- (optional) length of the arrows. Default is 1.
color -- hex color of the arrows. Default is 0x00ffff.
linewidth -- (optional) width of the arrow lines. Default is 1. (Setting lineWidth is currently not supported.)
2)Properties
See the base LineSegments class for common properties.
.matrixAutoUpdate : Object
See Object3D.matrixAutoUpdate. Set to false here as the helper is using the objects's matrixWorld.
.object : Object3D
The object for which the vertex tangents are being visualized.
.size : Number
Length of the arrows. Default is 1.
3)Methods
See the base LineSegments class for common methods.
.update () : undefined
Updates the vertex tangents preview based on the object's world transform.
4)效果预览
