
- 1在Docker中部署GreatSQL并构建MGR集群_docker-compose在三个虚机节点上部署mgr
- 2微信支付回调多次_微信支付回调频率
- 3最完整的ubuntu安装nvidia显卡驱动教程,亲测避坑!
- 4AI特训一:为什么要学习AI
- 5Win10 LTSB/LTSC安装微软商店/Microsoft store_win10ltsb powershell应用
- 6对比了最常见的几家开源OCR框架,我发现了最好的开源模型_ocr大模型
- 7app微信支付 php回调接口,App微信支付之php后台接口详解
- 8STM32HAL库学习笔记三——GPIO的HAL库编程_stm32 hal库 引脚模式
- 9为你的目标检测添加GUI可视化(Python)_pythongui实现监控图形化界面
- 10Caused by: java.lang.ClassNotFoundException常见异常解决方法
Unity UI上的物体跟随场景物体位置变化而变化(人物血条/称号)_unity ui跟随物体
赞
踩
首先看下UI上物体的位置计算(UI上的物体 以下用“血条”代称)
这个很简单 无非就是坐标转换 把人物的世界坐标转到屏幕坐标
代码如下:
public Transform target;
public Transform hpSp;
public Camera mainCamera;
void Update() {
Vector3 pos11 = mainCamera.WorldToScreenPoint(target.position);
hpSp.transform.localPosition = pos11;
}
这时候我们运行程序 发现欸嘿 不对啊

这时候 我们发现血条并没有按照我们的想法出现在规定的位置
那么是什么原因导致的呢?
这时候我们发现血条(UI)的坐标系的中心点在屏幕的中间位置(ui坐标) 而我们屏幕的坐标系的中心点是左下角
于是我们需要做一下屏幕坐标转UI坐标
代码如下:
public Transform target;
public Transform hpSp;
public Camera mainCamera;
void Update() {
Vector3 pos = mainCamera.WorldToScreenPoint(target.position);
//Screen.width和Screen.height分别为屏幕的宽的像素和屏幕的高的像素
Vector3 pos1 = new Vector3(pos.x - Screen.width / 2, pos.y - Screen.height / 2, pos.z);
hpSp.transform.localPosition = pos1;
}

这时候我们运行程序之后发现血条到了我们规定的位置
这时候 我改动了 我的屏幕分辨率 由1280/720 改为1600/900 然后我发现血条的位置发生了轻微的改动 于是我做了下一步操作
代码如下:
public Transform target;
public Transform hpSp;
public Camera mainCamera;
void Update() {
Vector3 pos = mainCamera.WorldToScreenPoint(target.position);
//Screen.width和Screen.height分别为屏幕的宽的像素和屏幕的高的像素
Vector3 pos1 = new Vector3(pos.x - Screen.width / 2, pos.y - Screen.height / 2, pos.z);
float scale = 1280f / Screen.width;
Vector3 screenPos = new Vector3(pos1.x * scale, pos1.y * scale, 0.0f);
hpSp.transform.localPosition = screenPos;
}
注: 我的 1280来源于这里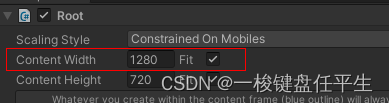
到了这里我觉得 血条挡在人脸上实在是难看 又懒得去找策划加血条位置的骨骼点 于是决定自己加一个血条距离人物的高度
代码如下:
public Transform target;
public Transform hpSp;
public Camera mainCamera;
public Vector3 offsetPos;void Update() {
Vector3 pos = mainCamera.WorldToScreenPoint(target.position+ offsetPos);
//Screen.width和Screen.height分别为屏幕的宽的像素和屏幕的高的像素
Vector3 pos1 = new Vector3(pos.x - Screen.width / 2, pos.y - Screen.height / 2, pos.z);
float scale = 1280f / Screen.width;
Vector3 screenPos = new Vector3(pos1.x * scale, pos1.y * scale, 0.0f);
hpSp.transform.localPosition = screenPos;
}


完整代码如下:
- public class test5 : MonoBehaviour {
- public Transform target;
- public Transform hpSp;
- public Camera mainCamera;
- public Vector3 offsetPos;
-
- void Update() {
- Vector3 pos = mainCamera.WorldToScreenPoint(target.position+ offsetPos);
- //Screen.width和Screen.height分别为屏幕的宽的像素和屏幕的高的像素
- Vector3 pos1 = new Vector3(pos.x - Screen.width / 2, pos.y - Screen.height / 2, pos.z);
- float scale = 1280f / Screen.width;
- Vector3 screenPos = new Vector3(pos1.x * scale, pos1.y * scale, 0.0f);
- hpSp.transform.localPosition = screenPos;
- }
- }

